Tivat & Podgorica Airports · Family-run since 2012
Car rental and airport transfers in Tivat, Montenegro.
Book in a few minutes and pay when you collect the car — no prepayment, no card holds. Basic insurance, unlimited kilometres and free cancellation are in every price.
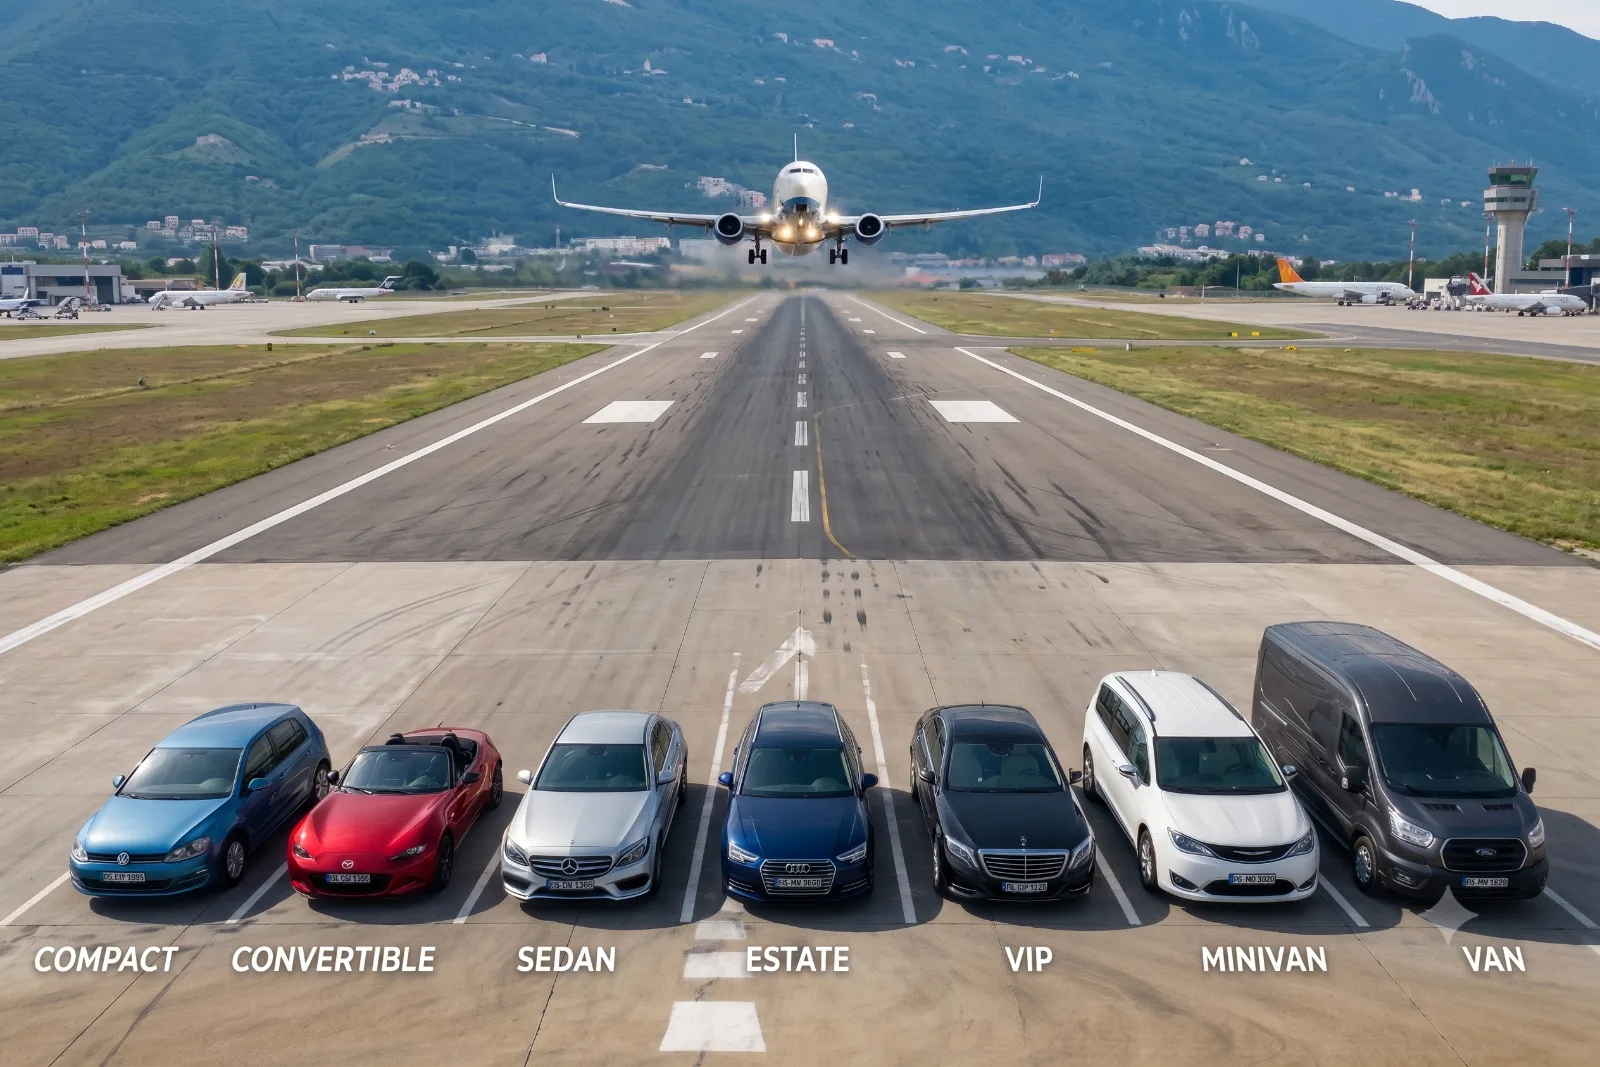
Our Fleet
A car for every kind of trip.
Every vehicle comes with unlimited kilometres and free cancellation.
How renting with us compares with a big international chain.
Us
Big chains
Pay when you collect the car — cash, card or transfer
Full prepayment online, card details required
Deposit in cash, handed straight back on return
Deposit blocked on your credit card
Unlimited kilometres on every car
Kilometres capped, extra charge per km
Second driver and child seats free
Charged per day
Free cancellation — nothing is charged in advance
Cancellation fee, or you lose the prepayment
Cross-border travel arranged — Green Card and authorisation prepared
Often not permitted at all
One WhatsApp number, answered by the owner
Call centre queues and ticket numbers
Our Story
Local, family-run, since 2012.
The people who hand you the keys, in person.
Arvello Rent a Car & Transfers started as a small, family-run garage in Tivat and grew into one of the first rental companies serving the Bay of Kotor. We still hand over every set of keys ourselves — no call centres, no franchise scripts, just local people who know the roads of Montenegro as well as they know their own driveway. Whether you are touring the Bay for a week or need a reliable transfer straight from the airport, we treat every booking like a favour asked by a neighbour.
Can't find your answer? Ask our chat assistant or message us on WhatsApp.
Do I need a credit card to book a car?+
No. There is no online payment and we never hold or block your card. You send a booking request, we confirm by WhatsApp or email, and you pay when you collect the car — in cash, by card or by bank transfer. A refundable cash deposit is taken at pickup unless you add Full Insurance, which removes it.
What is included in the price?+
Basic insurance, unlimited kilometres, a second driver, child seats, free cancellation and 24/7 roadside assistance. All prices include VAT. Border crossing is charged separately. With basic insurance you leave a refundable cash deposit at pickup and cover damage up to the limit shown on that vehicle's page; adding Full Insurance removes both.
Do you require a security deposit?+
Yes, unless you add Full Insurance. With basic insurance you leave a cash deposit when you collect the car — between 100 and 1000 EUR depending on the vehicle — and we hand it straight back when you return the car undamaged. It is cash at the desk, never a card block. Add Full Insurance and there is no deposit at all.
Can I pick up the car at Tivat Airport (TIV)?+
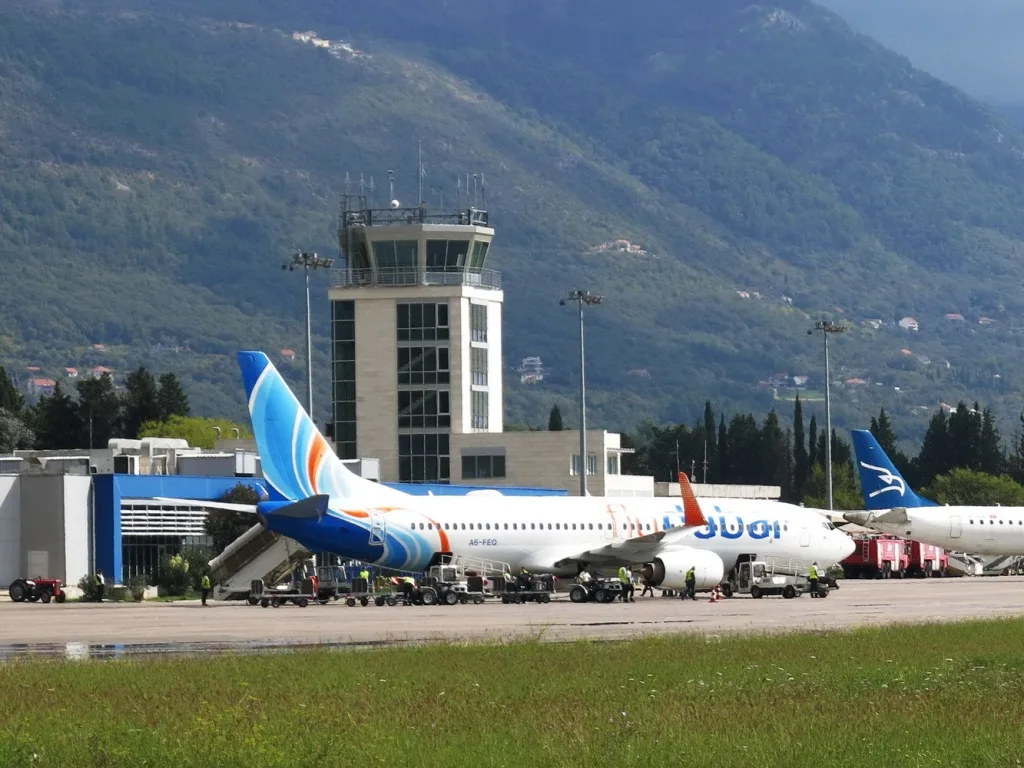
Yes. We meet every guest inside the arrivals area at Tivat Airport. Just add your flight number when you book so we can track it and adjust for delays.
What happens if my flight is delayed?+
We track your flight using the number you give us, so a late landing is not a problem — our driver or agent will be there when you land, at no extra charge.
Is there a fee for crossing the border into Croatia, Bosnia or Albania?+
Yes. Cross-border travel is charged as a separate extra, with basic or full insurance alike. Select the country when you book so we can prepare your Green Card and written authorisation before you travel — driving across without them is not permitted.
Address Tivat Airport, Lorovina, 85320 Tivat, Montenegro
Working hours
Monday – Sunday
06:00 – 22:00
Follow us on Instagram
Country
Orijinal metin
Bu çeviriyi değerlendirin
Geri bildiriminiz, Google Çeviri'yi iyileştirmek için kullanılacaktır
Uputstvo za vlasnika sajta
Kako da sam mijenjaš sve na sajtu
Ovo uputstvo je napisano najjednostavnije što može. Ako umiješ da otvoriš Facebook, umiješ i ovo. Nema programiranja. Samo kucaš u polja i pritiskaš dugmad.
★Počni odavde
Prvo: kako se ulazi u admin panel
Nema korisničkog imena ni lozinke. Ulazi se tajnom adresom: adresa tvog sajta, pa znak #, pa tajni ključ. Bez razmaka.
https://arvellorantacar.com#admin-CHANGE-ME
Ukucaj to u Chrome i pritisni Enter. Sajt nestane, pojavi se plavi panel — unutra si. Detaljno je u .
Drugo, i najvažnije: panel i sajt nisu ista stvar
Ovo je jedina stvar koju moraš razumjeti prije nego što išta dirneš. Kad nešto promijeniš u panelu, sajt na internetu se ne mijenja sam od sebe. Ti gledaš svoju verziju, na svom ekranu. Gosti i dalje gledaju staru.
Da bi gosti vidjeli promjenu, moraš je poslati na internet. To je uvijek isti put, uvijek sva tri koraka:
Promijeni — nađi stranu u meniju i otkucaj što treba.
Save — pritisni dolje Save all changes on this page. Promjena je sad sačuvana u panelu. Vidiš je na svom ekranu. Gosti je i dalje ne vide.
Publish + Cloudflare — skini fajl sa strane Publish / Export, pa ga prevuci na Cloudflare. Tek sada gosti vide novo. ( i .)
Zamisli to ovako
Save je kao kad napišeš pismo i staviš ga u koverat. Pismo postoji, ali je kod tebe u kući.
Publish + Cloudflare je odlazak do pošte. Tek kad predaš koverat, pismo stiže drugome.
Ako uradiš samo Save i zatvoriš kompjuter — pismo ostaje kod tebe, i to zauvijek nestane. Sjutra ćeš na sajtu vidjeti staro stanje i pitati se gdje ti je nestao rad.
Kako se koristi ovo uputstvo
Lijevo je spisak svih tema — klikni na temu i odmah skačeš na nju. Ako nešto brzo tražiš, kucaj u polje Traži gore lijevo (npr. „cijena“ ili „slika“) i ostaće samo teme koje ti trebaju.
1Zlatna pravila
Pet stvari. Ako ih zapamtiš, ne možeš ništa pokvariti.
1. Ne zatvaraj karticu
Panel ne pamti ništa sam od sebe. Ako zatvoriš prozor prije nego što uradiš Publish — sve što si kucao je nestalo. Zauvijek.
2. Uvijek radi na živom sajtu
Otvori pravu adresu sajta u pretraživaču. Nikad ne otvaraj index.html koji ti stoji na kompjuteru.
3. Snimi pa idi dalje
Prije nego što odeš na drugu stranu menija — pritisni Save all changes on this page. Inače gubiš to što si kucao.
4. Brisanje se ne vraća
Kad obrišeš auto ili pitanje i snimiš — nema „nazad“. Prvo dobro pogledaj, pa onda briši.
5. Poslije svega — Publish
Nije gotovo dok ne skineš fajl i ne prevučeš ga na Cloudflare. To je poglavlja 25 i 26.
Najčešća greška u praksi
Čovjek mijenja cijene sat vremena, sve lijepo snimi, zatvori kompjuter — i sjutra vidi da je na sajtu sve po starom. Zato što nije uradio Publish. Sve je bilo izgubljeno.
Zapamti ovaj red: Kucaj → Save → Publish → Cloudflare. Uvijek sva četiri.
2Kako da uđeš u admin panel
Nema korisničkog imena ni lozinke. Ulazi se tajnom adresom. Ko zna adresu — ušao je.
Otvori Chrome (ili Safari) na kompjuteru.
Ukucaj adresu sajta, pa bez razmaka dodaj znak # i tajni ključ:
https://arvellorantacar.com#admin-CHANGE-ME
Pritisni Enter. Sajt nestaje, pojavljuje se plavi panel. To je to — unutra si.
Sačuvaj sebi u Favorite
Kad si već unutra, pritisni zvjezdicu u pretraživaču i sačuvaj tu adresu pod imenom „Admin“. Sjutra samo klikneš i odmah si unutra. Ne šalji tu adresu nikome.
Kako da izađeš iz panela
Gore desno je dugme View site. Pritisneš ga i vidiš svoj sajt onako kako ga vide gosti. Panel se samo sakrio, nije nestao — vratiš se tako što ponovo dodaš #kljuc na adresu.
Promjena tajnog ključa
Trenutni ključ je admin-CHANGE-ME. To je fabrički ključ i mora se promijeniti prije nego što sajt krene uživo, jer ga neko može pogoditi.
Meni: Business → General
Skroluj do kartice Integrations & security.
U polje Admin key upiši nešto svoje što niko ne pogađa. Npr. milos-tivat-9417. Bez razmaka, bez naših slova (č, ć, š, ž, đ).
Pritisni Save integrations & security. Adresa u pretraživaču se odmah sama promijeni.
Odmah uradi Publish (poglavlje 25), inače stari ključ ostaje na internetu.
Sačuvaj novu adresu u Favorite i obriši staru.
Ako zaboraviš ključ
Nema dugmeta „zaboravio sam lozinku“. Nećeš moći da uđeš. Zapiši ključ na papir i drži ga na sigurnom mjestu.
3Mapa panela — gdje je šta
Gore (traka koja stoji uvijek)
Admin — Arvello Rent a Car — samo naziv, ništa se ne klikće.
View site — pogledaj sajt kao gost.
Publish / Export — prečica do skidanja fajla za objavljivanje.
Lijevo (meni sa 5 fioka)
Klikneš na naziv fioke i ona se otvori. Unutra su strane.
Fioka
Šta je unutra
Kad je otvaraš
Business
General, Locations, Legal Documents
Podaci o firmi, telefoni, radno vrijeme, mjesta preuzimanja, ugovori
Fleet & Prices
Vehicles, Extras & Pricing, Transfer Routes, Seasons
Ovdje ćeš biti najviše. Auta, cijene, dodaci, transferi
Content
Site Text, FAQ, Guest Reviews, Comparison Table, Trust Badges, Our Story
Tekstovi, pitanja i odgovori, utisci gostiju, priča o firmi
Appearance
Theme & Colors, Logo & Branding, Homepage Hero, Icons, Media Files, Section Order
Boje, logo, naslovne slike, redosljed sekcija
Publish
Publish / Export
Kad si sve završio i hoćeš da objaviš
Na telefonu izgleda drugačije
Na telefonu nema menija sa strane. Umjesto njega imaš padajuću listu na vrhu ekrana — klikneš na nju i izabereš stranu. Sve ostalo radi isto.
Savjet: mijenjaj sitnice s telefona ako moraš, ali objavljivanje (Publish) radi sa kompjutera — lakše je.
Sredina (radni prostor)
Svaka strana je podijeljena na bijele kartice. Svaka kartica ima naslov, kratko objašnjenje i svoje dugme za snimanje. Dolje uvijek stoji veliko dugme Save all changes on this page.
4Kako se snima — dva dugmeta
U panelu postoje dvije vrste dugmadi za snimanje. Ne bunivši se — rade skoro isto.
Dugme
Šta radi
Kad ga koristiš
Save… (u kartici)
Snima samo tu jednu karticu. Npr. Save working hours snima samo radno vrijeme.
Kad si promijenio jednu sitnicu i hoćeš odmah da vidiš rezultat
Save all changes on this page (dolje, stalno vidljivo)
Snima sve kartice na toj strani odjednom.
Uvijek ovo koristi. Sigurnije je — ne možeš ništa zaboraviti.
Najlakše pravilo
Zaboravi na mala dugmad. Kad završiš rad na jednoj strani — pritisni dolje Save all changes on this page i idi dalje. Gotovo.
Kako znaš da je snimljeno
Kad snimiš, gore se na sekund pojavi zelena poruka (npr. „Vehicles saved.“). Ako poruka nije iskočila — nisi snimio, pritisni ponovo.
Dvije strane na kojima nema dugmeta Save
Media Files i Publish / Export nemaju dugme za snimanje. To je normalno — na njima se ništa ne kuca.
Šta se dešava kad promijeniš stranu bez snimanja
Sve što si otkucao nestaje. Bez pitanja, bez upozorenja. Zato: prvo Save, pa onda klik na drugu stranu.
5Kako se piše na 4 jezika
Sajt govori četiri jezika: engleski (EN), ruski (RU), hebrejski (HE) i naški (SR). Zato skoro svako polje za tekst ima malo dugme sa globusom 🌐 sa strane.
U polju vidiš jedan jezik — obično engleski. Piše EN na dugmetu.
Klikni na globus. Otvori se lista: EN, RU, HE, SR.
Izaberi jezik. Polje se promijeni i sad kucaš na tom jeziku.
Kucaj → opet globus → sljedeći jezik. Kad si gotov, snimi.
Šta znači narandžasta tačkica
Ako na globusu vidiš narandžastu tačkicu — znači da bar jedan jezik nije popunjen. U listi pored svakog jezika stoji kvačica ✓ ako je popunjen.
Ne moraš popuniti sve jezike
Ako ostaviš ruski prazan, sajt će ruskom gostu prikazati engleski tekst. Sajt se nikad ne pokvari zbog praznog polja. Narandžasta tačkica je samo podsjetnik, nije greška.
Pravilo: engleski uvijek popuni. Ostalo kad stigneš.
Hebrejski se piše zdesna nalijevo
Kad izabereš HE, tekst ide na drugu stranu. To je normalno, tako se piše hebrejski. Ne diraj ništa.
6Vozila — najvažnije poglavlje
Meni: Fleet & Prices → Vehicles
Ovdje dodaješ auta, mijenjaš cijene, kačiš slike i sakrivaš auto koje je trenutno zauzeto. Ovdje ćeš provoditi 90% vremena.
6.1 Dvije postavke iznad spiska
Polje
Šta radi
Homepage display limit
Koliko auta se vidi na naslovnoj strani. Ostala su na strani /cars gdje se uvijek vide sva. Npr. upišeš 9 → na naslovnoj 9 auta i dugme „See more cars“.
Show the „Deposit & insurance“ box
Kvačica. Ako je uključena, na strani svakog auta se vidi kućica sa depozitom i osiguranjem. Ako je isključiš, strana je kraća — ali pravila i dalje važe, samo se ne ponavljaju tu.
6.2 Kako izgleda jedan red u spisku
Svako auto je jedan red. Sa lijeva na desno:
↑↓ — pomjeri auto gore ili dolje u spisku. Gornja auta se prva vide gostima.
Naziv auta i ispod sitno klasa i cijena. Klikni na naziv da se red otvori.
Visible — kvačica. Skini je i auto nestaje sa sajta, ali ostaje kod tebe. Pojavi se natpis HIDDEN.
🗑 — briše auto zauvijek.
Auto je izdato ili na servisu?
Nemoj ga brisati. Samo skini kvačicu Visible i snimi. Nestane sa sajta. Kad se vrati — vrati kvačicu. Tako ne gubiš slike, cijene ni opis.
6.3 Osam blokova unutar auta
Kad klikneš na naziv auta, red se otvori i unutra je osam blokova, svaki sa svojim brojem u plavom krugu. Idemo redom.
Blok 0 — Photos (slike)
Može najviše 5 slika po autu.
Prva slika ima žutu oznaku MAIN — to je slika koju gost prvo vidi.
Da ubaciš sliku: klikni Choose file / Odaberi datoteku ispod praznog kvadrata i izaberi sliku sa kompjutera.
★ — postavi tu sliku kao glavnu (prebaci je na prvo mjesto).
↑↓ — pomjeri sliku lijevo/desno.
🗑 — obriši sliku.
+ Add photo — dodaj još jedno mjesto za sliku (dok ne dođeš do 5).
Ne moraš smanjivati slike
Panel sam smanji i stisne svaku sliku. Slobodno kači slike direktno sa telefona. Najbolje izgleda kad je auto slikano vodoravno (položeno), cijelo u kadru, po danu.
Blok 1 — Vehicle name (naziv)
Samo jedno polje, bez prevoda — naziv auta je isti na svim jezicima. Npr. Toyota Yaris or similar.
Blok 2 — Description (opis)
Dvije-tri rečenice o autu. Ima globus — prevedi na 4 jezika.
Blok 3 — Specifications (podaci o autu)
Redovi koje gost vidi na strani auta. Možeš ih dodavati, brisati i mijenjati im redosljed.
Custom specification… — tvoj vlastiti red. Sam upisuješ i naziv i vrijednost, na 4 jezika. Npr. „Krovni nosač — da“.
Izabereš tip iz padajuće liste i pritisneš + Add.
Svaki red ima strelice za pomjeranje i kantu za brisanje.
Blok 4 — Included with this vehicle (šta je uključeno)
Spisak sa kvačicama koji gost vidi. Npr. „Osnovno osiguranje“, „Neograničeni kilometri“.
+ Add bullet dodaje novi red. Kanta briše red. Svaki red ima globus za prevod.
Blok 5 — Vehicle rules (pravila)
Isto kao blok 4, ali za pravila. Npr. „Zabranjeno pušenje“, „Minimum 21 godina“.
+ Add rule dodaje red.
Blok 6 — Deposit & insurance (depozit i osiguranje)
Ovo su najosjetljivija četiri polja u cijelom panelu. Pogrešan broj = pogrešna cijena gostu.
Polje
Značenje
Deposit
Keš koji gost ostavlja pri preuzimanju i dobija nazad kad vrati auto neoštećeno.
Damage responsibility
Najviše koliko gost plaća ako ošteti auto — kad nema puno osiguranje.
Damage liability WITH full insurance
Najviše koliko gost plaća ako ošteti auto — kad ima puno osiguranje. Obično 0.
Full Insurance / day
Koliko košta puno osiguranje po danu za baš to auto. Gost ga bira kao dodatak pri rezervaciji.
Pazi
Ova četiri broja su za svako auto posebno. Skuplji auto = veći depozit. Ako dodaš novo auto, ova polja startuju na 0 — moraš ih ti popuniti.
Blok 7 — Pricing & price tiers (cijene po broju dana)
Ovdje se određuje dnevna cijena. Radi na stepenice: što više dana, to jeftinije po danu.
Polje
Značenje
From (days)
Od kog dana važi ova cijena
To (days)
Do kog dana. Ostavi prazno = „i više“
Rate / day
Cijena po danu u evrima
Note
Sitan tekst koji gost vidi, npr. „Cijena za 4+ dana“. Ima globus.
Primjer koji radi:
Stepenica
From
To
Rate
1.
1
3
40
2.
4
6
34
3.
7
(prazno)
28
+ Add tier dodaje stepenicu. Kanta je briše (posljednja se ne može obrisati).
Panel te sam upozori ako pogriješiš
Ako ostaviš rupu (npr. 1–3 pa 5–7, a dan 4 nema cijenu) ili se stepenice preklope, pojavi se žuti okvir koji ti tačno kaže gdje je greška. Snimanje neće biti blokirano — ti moraš ispraviti. Pročitaj to upozorenje.
6.4 Kako da dodaš novo auto — korak po korak
Meni: Fleet & Prices → Vehicles
Skroluj do dna spiska i pritisni + Add vehicle.
Pojavi se auto po imenu New vehicle, na kraju spiska. Klikni na njega da se otvori.
Blok 1: upiši pravi naziv, npr. Toyota Yaris or similar.
Blok 0: ubaci slike. Najbolju stavi prvu (★).
Blok 2: napiši opis na engleskom, pa preko globusa i na ostalim jezicima.
Blok 3: podesi klasu, mjenjač, gorivo, broj sjedišta, vrata, kofera.
Blok 6: upiši sva četiri broja — depozit, odgovornost, odgovornost sa punim osiguranjem, cijena punog osiguranja po danu. Ne preskači ovo.
Blok 7: podesi cijene po danima. Fabrički su 40 / 34 / 28 € — promijeni na svoje.
Blokovi 4 i 5: provjeri šta je uključeno i pravila. Obično ništa ne treba mijenjati.
Pritisni dolje Save all changes on this page.
Strelicama ↑ pomjeri auto na mjesto koje želiš u spisku i opet snimi.
Idi na Publish (poglavlje 25) — jer si dodao slike, treba ti ZIP.
7Dodaci i cijene (Extras)
Meni: Fleet & Prices → Extras & Pricing
Sve što gost može da doda uz rezervaciju: dječje sjedište, prelazak granice, puno osiguranje, drugi vozač…
7.1 Šest vrsta dodataka
Najvažnije polje kod svakog dodatka je Behaviour type — ono određuje kako se dodatak ponaša i naplaćuje.
Vrsta
Kako radi
Primjer
Included
Uvijek uključeno, samo informacija. Gost ga ne bira i ne plaća.
Osnovno osiguranje
Free
Gost ga uključuje prekidačem, ali ne plaća ništa.
Dječje sjedište besplatno
Per day
Prekidač. Cijena × broj dana.
GPS 3 €/dan
One-time
Prekidač. Plaća se jednom, bez obzira na dane.
Prelazak granice
Per unit
Gost bira količinu (+ i −). Cijena × komad.
2 dječja sjedišta
Full Insurance
Posebno. Cijenu ne upisuješ ovdje — uzima se iz svakog auta (blok 6).
Puno osiguranje
Polja za cijenu se sama mijenjaju
Kad promijeniš Behaviour type, polja ispod se prilagode: kod „Per day“ dobiješ Price / day, kod „One-time“ dobiješ Flat price, kod „Per unit“ dobiješ Price / unit i Max quantity, a kod „Full Insurance“ nema polja za cijenu jer ide iz auta.
7.2 Posebno: prelazak granice
Dodatak tipa One-time može da ima i spisak država.
Uključi kvačicu Show a destination-country dropdown to the guest.
Ispod se otvori polje Country list — upiši jednu državu po redu: HrvatskaBosna i HercegovinaAlbanijaSrbija
Ista cijena važi za sve države sa spiska. Ako Hrvatska košta drugačije od Albanije, moraš napraviti dva odvojena dodatka.
7.3 Ostala polja
Icon — sličica pored dodatka. Izabereš iz liste, ispod se odmah vidi kako izgleda.
Label — naziv koji gost vidi. Globus, 4 jezika.
Note — sitno objašnjenje ispod naziva. Nije obavezno.
Visible / offered — kvačica. Skini je i dodatak nestaje sa sajta.
+ Add extra pravi novi dodatak (startuje kao „Per day“, cijena 0). Strelice mijenjaju redosljed, kanta briše.
8Transferi — rute i cijene
Meni: Fleet & Prices → Transfer Routes
8.1 Dvije postavke iznad spiska
Homepage display limit — koliko ruta se vidi na naslovnoj. Sve su uvijek na strani /transfers.
Round-trip discount (%) — popust kad gost uzme transfer u oba smjera. Upišeš npr. 10 i sistem sam skida 10% sa zbira.
8.2 Jedna ruta
Polje
Značenje
From
Odakle. Biraš iz liste mjesta.
To
Dokle. Biraš iz liste mjesta.
Price (Sedan)
Osnovna cijena — za limuzinu, u jednom smjeru.
Duration (minutes)
Koliko traje vožnja u minutima. Gost ovo vidi u tabeli.
Price per vehicle class — cijena za svaku klasu vozila, u jednom smjeru:
Sedan
do 3 putnika
Minivan
do 6 putnika
Van
do 8 putnika
VIP
luksuzno vozilo
Visible on site
Kvačica. Skini je i ruta nestane sa sajta.
Popuni sve četiri klase
Ako ostaviš neku klasu praznu, uzima se cijena iz polja Price (Sedan). To znači da bi kombi mogao da košta kao limuzina. Uvijek upiši sva četiri broja.
+ Add route pravi novu rutu (fabrički: Tivat Aerodrom → Kotor, 20 €, 20 min). Odmah izmijeni na svoje.
9Sezone — ljetnje i zimske cijene
Meni: Fleet & Prices → Seasons
Sezona ne mijenja cijene ručno. Ona množi cijenu svakog auta određenim brojem, u mjesecima koje ti izabereš.
Množilac
Šta se desi
1.0
Puna cijena, ništa se ne mijenja
1.3
30% skuplje (ljeto)
0.8
20% jeftinije (zima)
0.7
30% jeftinije
Polja
Season name — naziv, npr. „Visoka sezona“. Globus, 4 jezika.
Price multiplier — broj iz tabele gore.
Months in this season — kvačice za 12 mjeseci. Označi mjesece koji pripadaju ovoj sezoni.
Active — kvačica. Isključi je i sezona više ne utiče na cijene.
Jedan mjesec = jedna sezona
Nikad ne stavljaj isti mjesec u dvije sezone. Ako mjesec nije ni u jednoj sezoni — naplaćuje se po punoj cijeni (1.0). To je u redu.
Kako radi u praksi
Ako auto košta 40 €/dan, a jul je u sezoni sa množiocem 1.3 — u julu gost vidi 52 €/dan. Ne moraš mijenjati cijenu auta.
10Mjesta preuzimanja i vraćanja
Meni: Business → Locations
Ovo su mjesta koja gost bira u padajućoj listi kad rezerviše auto.
Polje
Značenje
Internal value
Tehnička oznaka. Bez razmaka, bez naših slova. Npr. tivatCenter. Gost je ne vidi. Ne diraj kod postojećih mjesta.
Label
Naziv koji gost vidi, npr. „Tivat — centar“. Globus, 4 jezika.
Pickup fee
Doplata kad gost preuzima tu. Upiši 0 ako nema doplate.
Return fee
Doplata kad gost vraća tu. Naplaćuje se jednom.
Zašto ne smiješ dirati „Internal value“
Ta oznaka povezuje mjesto sa rutama transfera i sa rezervacijama. Ako je promijeniš kod postojećeg mjesta, veze se prekidaju i nešto na sajtu prestane da radi. Mijenjaj samo Label.
+ Add location pravi novo mjesto. Strelice mijenjaju redosljed u listi, kanta briše.
11Podaci o firmi (General)
Meni: Business → General
Ovo je duga strana sa sedam kartica. Idemo redom.
Kartica 1 — Business identity (podaci firme)
Polje
Šta upisuješ
Business name
Ime koje gost vidi svuda, npr. „Arvello Rent a Car“
Legal name
Puni pravni naziv iz rješenja, ide u podnožje i na račune
PIB / Tax number
PIB firme
PDV / VAT number
PDV broj
Founded year
Godina osnivanja. Pojavljuje se u podnožju i u „Est. …“
Currency symbol
Znak valute. Kod nas €
Address
Puna adresa
City
Grad
Map latitude / longitude
Koordinate za mapu. Nađeš ih tako što u Google Maps klikneš desnim tasterom na svoje mjesto — pojave se dva broja.
Kartica 2 — Contact & booking (kontakt)
Polje
Šta upisuješ
Phone (display)
Broj kako se vidi, sa razmacima: +382 69 828 454
Phone (tel: link)
Isti broj bez razmaka, za dugme „Pozovi“: +38269828454
WhatsApp number
Samo cifre, bez plusa i razmaka: 38269828454
Email address
Mejl na koji stižu rezervacije
Google Maps embed URL
Mapa u kontakt sekciji. Idi na Google Maps → Share → Embed a map → kopiraj cijeli kod i zalijepi. Može i sama adresa. Kratki linkovi tipa maps.app.goo.gl ne rade — panel ih pokuša popraviti sam. Poslije snimanja obavezno provjeri kontakt sekciju.
Website domain
Prava adresa sajta sa https://. Koristi je Google. Ostavi prazno dok domen nije kupljen i podešen.
Instagram / Facebook / TripAdvisor URL
Puni linkovi na profile
Kartica 3 — Phone numbers by language (brojevi po jeziku)
Nije obavezno. Koristi se ako jedan jezik ima svoj broj — npr. kolega koji govori hebrejski ima izraelski broj.
Za svaki jezik imaš tri polja: prikazani broj, broj za pozivanje, WhatsApp broj.
Ostavi prazno = koristi se glavni broj iz kartice 2. Popunjavaj samo ono što je stvarno drugačije.
Kad gost promijeni jezik sajta, broj u zaglavlju i zeleno WhatsApp dugme se sami mijenjaju na broj tog jezika.
Izuzetak: u Contact sekciji se uvijek vide svi brojevi, svaki sa oznakom jezika koji pokriva.
Kartica 4 — Working hours (radno vrijeme)
Svaki red ima tri polja:
Day/label — kako se piše gostu, npr. „Ponedjeljak – Nedjelja“. Ima globus.
Hours — vrijeme kako se vidi gostu, npr. 06:00 – 22:00
Search engine format — isto to, ali u obliku koji razumije Google. Gost ovo ne vidi. Piše se skraćeno na engleskom i 24-časovno: Mo-Su 06:00-22:00 · Mo-Fr 08:00-20:00
Skraćenice: Mo Tu We Th Fr Sa Su. Raspon se piše sa crticom.
+ Add row dodaje red, Remove row briše.
Kartica 5 — Languages (jezici)
Za svaki od četiri jezika:
Kvačica — da li se jezik uopšte nudi gostima. Skini je i jezik nestaje iz liste.
Language name in English — samo za tebe u panelu.
Name shown to guests — kako piše gostima, na tom jeziku: English, Русский, עברית, Srpski.
Short code — dva slova na malom dugmetu na telefonu: EN, RU, HE, SR.
Engleski je jezik na kojem je sve popunjeno. Ostala tri, ako nešto fali, sama uzimaju engleski tekst.
Kartica 6 — Integrations & security
Web3Forms access key — ključ zbog kojeg ti rezervacije stižu na mejl. Ne diraj ga. Ako ga obrišeš, prestaje slanje mejlova.
Admin key — tajni ključ za ulazak u panel. Vidi poglavlje 2.
Ispod stoji ispisana tvoja trenutna admin adresa — može se kopirati odatle.
Kartica 7 — Analytics & Privacy (statistika)
GA4 Measurement ID — Google Analytics, oblika G-XXXXXXXXXX, plus kvačica Enable.
Cloudflare Web Analytics token — jednostavnija statistika, bez kolačića, plus kvačica Enable.
Zakon je ispoštovan sam od sebe
Statistika se ne pokreće dok gost ne pritisne „Prihvatam“ na traci sa kolačićima. Ako polje ostaviš prazno, taj alat je potpuno isključen. Tekst trake sa kolačićima se mijenja u Content → Site Text, ključevi koji počinju sa cookie.
12Pravni dokumenti (Legal)
Meni: Business → Legal Documents
Sedam dokumenata, svaki na četiri jezika:
General provisions — uvodni dio Uslova korišćenja
Rental Terms — uslovi najma
Transfer Terms — uslovi transfera
Insurance Policy — osiguranje
Cancellation Policy — otkazivanje
Privacy Policy — privatnost
Cookie Policy — kolačići
Četiri dokumenta se sama spajaju
Rental Terms + Transfer Terms + Insurance Policy + Cancellation Policy se automatski spajaju, tim redom, u jedan dokument „Terms and Conditions“ koji gost prihvata pri rezervaciji. Svaki pišeš samo jednom, ovdje.
Kako se formatira tekst
Kucaš ovo
Dobiješ
## Naslov
Veliki naslov
### Podnaslov
Manji naslov
**tekst**
Podebljano
__tekst__
Podvučeno
- stavka
Stavka sa tačkicom
Znakovi ## i - moraju biti na samom početku reda, pa razmak, pa tekst.
Automatska polja
Ako u tekstu ostaviš {amount} ili [CURRENCY], sajt ih sam zamijeni pravim brojem i valutom.
Ovo je jedino mjesto gdje treba advokat
Ovo su pravno obavezujući dokumenti. Ne mijenjaj ih sam. Ako treba nešto promijeniti — prvo pitaj advokata, pa onda kucaj ovdje. Sve ostalo u panelu možeš mijenjati slobodno.
13Tekstovi sajta (Site Text)
Meni: Content → Site Text
Ovdje je svaki natpis na cijelom sajtu — svako dugme, svaka poruka, svaki naslov. Ima ih na stotine.
Kako da nađeš ono što tražiš
Gore je polje Search. Ukucaj riječ koju vidiš na sajtu — na bilo kom jeziku.
Ostaju samo redovi u kojima ta riječ postoji.
Klikni na polje, promijeni tekst. Globusom prevedi na ostale jezike.
Pritisni Save site text.
Grupe u koje su tekstovi razvrstani
Grupa
Šta pokriva
Homepage sections
Naslovna strana — naslovi svih sekcija
Vehicles & booking page
Strana auta i panel za rezervaciju
Airport transfer
Transferi
Forms, wizard & confirmation
Formulari, koraci rezervacije, potvrda
Standalone pages
Posebne strane: recenzije, priča, FAQ, auta, transferi
Header, footer & cookies
Zaglavlje, podnožje, traka sa kolačićima
WhatsApp & e-mail messages
Tekst poruke koja se šalje na WhatsApp i mejl
System & accessibility
Sitne sistemske poruke
Pravilo za ovu stranu
Mijenjaj samo riječi. Ako u tekstu vidiš nešto u vitičastim zagradama, tipa {amount} ili {year} — ostavi to netaknuto. To su mjesta gdje sajt sam ubacuje broj. Ako ih obrišeš, gost vidi prazno mjesto.
Nazivi jezika se ne mijenjaju ovdje
„English / Русский / עברית / Srpski“ i dvoslovne oznake mijenjaš u Business → General → Languages, ne ovdje.
14Česta pitanja (FAQ)
Meni: Content → FAQ
Tri kartice
Homepage display — koliko pitanja se vidi na naslovnoj. Na strani /faq se uvijek vide sva.
Section text — natpis, naslov i podnaslov iznad pitanja.
FAQ — sama pitanja.
Jedno pitanje
Polje
Značenje
Category
Samo za tebe — služi da se snađeš. Gost je ne vidi.
Question
Pitanje. Globus, 4 jezika.
Answer
Odgovor. Globus, 4 jezika.
Visible on site
Da li se pitanje uopšte vidi
Show on homepage
Da li ide i na naslovnu (u okviru gornjeg limita)
Kako da ti Google poveća posjetu
Piši pitanje tačno onako kako bi ga gost ukucao u Google. Ne „Depozit“, nego „Da li mi treba kreditna kartica za rezervaciju?“. Takva pitanja Google prikazuje direktno u rezultatima.
+ Add question dodaje pitanje.
15Utisci gostiju (Guest Reviews)
Meni: Content → Guest Reviews
Polje
Šta upisuješ
Name
Ime gosta
Country
Država gosta
Rating (1-5)
Broj zvjezdica, od 1 do 5
Date
Datum. Otvara se kalendar.
Source
Odakle je utisak: Google, TripAdvisor, Direct / WhatsApp, ili ništa
Quote
Sam tekst utiska. Globus, 4 jezika.
Guest photo
Neobavezno. Lijepo je slika primopredaje ključeva.
Visible on site
Da li se utisak vidi
Show on homepage
Da li ide i na naslovnu
Ako nijedan utisak nije označen za naslovnu
Cijela sekcija „Utisci gostiju“ se sama sakrije sa naslovne. Ne gubi se — svi utisci ostaju na strani /reviews gdje gost može da filtrira po zvjezdicama.
Pošteno je pošteno
Piši samo prave utiske pravih gostiju. Izmišljeni utisci su prekršaj i mogu donijeti kaznu, a gosti ih ionako brzo prepoznaju.
16Tabela poređenja
Meni: Content → Comparison Table
Tabela u sekciji „Zašto rezervisati direktno“ — dvije kolone: Us (mi) i Others (veliki lanci).
Icon — sličica na početku reda.
Us — šta ti nudiš. Globus, 4 jezika.
Others — kako to rade veliki. Globus, 4 jezika.
Kako se piše dobar red
Uvuci temu u samu rečenicu. Ne piši samo „Depozit“, nego „Depozit u kešu — vraća se odmah“. Tako gost razumije bez razmišljanja.
17Značke povjerenja (Trust Badges)
Meni: Content → Trust Badges
Red malih natpisa sa sličicama na naslovnoj: „Bez avansa“, „Neograničeni kilometri“ i slično.
Icon — sličica.
Text — kratak natpis. Globus, 4 jezika.
Visible on site — kvačica.
Dvije skraćenice koje možeš koristiti
{amount} — sajt sam upiše iznos odgovornosti za štetu. {year} — sajt sam upiše godinu osnivanja.
Primjer: kucaš Na tržištu od {year}, gost vidi „Na tržištu od 2012“.
Da sakriješ cijeli red značaka odjednom, idi na Appearance → Section Order i skini kvačicu kod „Trust Badges“.
18Naša priča (Our Story)
Meni: Content → Our Story
Kartica 1 — Naslov
Tri polja: natpis iznad naslova, glavni naslov i slogan.
Kartica 2 — Tekst priče
Glavni tekst o firmi. Veliko polje, globus, 4 jezika.
Kartica 3 — Tri brojke
Tri pločice ispod teksta. Za svaku mijenjaš i brojku i opis, na sva 4 jezika.
Npr. brojka 14+, opis „Godina na primorju“.
Kartica 4 — Galerija
Do 12 slika. Na naslovnoj se same smjenjuju kao slajdšou, a na strani /our-story se vide sve u mreži.
Svaka slika može imati natpis (ime radnika, funkcija, datum) na 4 jezika.
Strelice mijenjaju redosljed, kanta briše.
Poslije mijenjanja natpisa pritisni Save captions.
Kartica 5 — Poglavlja priče
Duži tekstovi koji idu na stranu /our-story. Dobri su za Google jer sajt ima više teksta.
Homepage display limit — koliko poglavlja može na naslovnu.
Svako poglavlje: Heading (naslov), Text (tekst), Photo (slika, neobavezno).
Visible on site — da li se uopšte vidi.
Show on homepage — da li ide i na naslovnu.
+ Add chapter dodaje poglavlje.
19Boje sajta (Theme & Colors)
Meni: Appearance → Theme & Colors
Najlakši način — gotove palete
Gore je mreža od 12 gotovih kombinacija boja. Klikni na bilo koju i cijeli sajt odmah promijeni boju, pred tvojim očima. Ako ti se ne sviđa — klikni drugu. Kad nađeš onu pravu, snimi.
Ručno podešavanje
Ispod paleta je sedam boja. Svaka ima kvadratić (klik = otvori se birač boja) i polje sa šifrom boje.
Boja
Gdje se vidi
Deep navy
Glavna tamna pozadina — zaglavlje, podnožje
Navy — mid
Srednja nijansa
Navy — light accent
Svjetlija nijansa
Accent gold
Boja glavnih dugmadi
Accent gold — light
Boja dugmeta kad pređeš mišem preko njega
Accent ink
Boja slova na zlatnom dugmetu
Paper
Svijetla pozadina sekcija
Savjet iskusnog
Izaberi gotovu paletu i ne diraj pojedinačne boje. Palete su napravljene tako da su slova uvijek čitljiva. Ako sam mijenjaš, lako ti se desi bijelo na žutom — što niko ne može pročitati.
20Logo i font (Logo & Branding)
Meni: Appearance → Logo & Branding
Logo
Klikni Choose file i izaberi logo. Panel ga sam smanji i stisne, ali ostaje oštar.
PNG sa providnom pozadinom je najbolji — providnost se čuva. Rade i JPG, WebP i SVG.
Logo display height — visina loga u zaglavlju, u pikselima. Može od 24 do 120. Standardno je 48.
Pritisni Save logo settings.
Font naziva firme
Padajuća lista sa 8 fontova. Ispod liste vidiš živi primjer — ime tvoje firme napisano tim fontom.
Classic Serif — toplo, ozbiljno (trenutno)
Elegant Didone — luksuzno
Traditional Serif — knjiško
Slab Serif — čvrsto
Neutral Sans — čisto, korporativno
Geometric Sans — moderno
Humanist Sans — prijateljski
System UI — kao ostatak sajta
Ovaj font se koristi samo za naziv firme u zaglavlju i podnožju. Ostalo se ne mijenja.
Slika za dijeljenje
Slika koja se pojavi kad neko podijeli link tvog sajta na WhatsApp, Facebook ili Instagram. Na samom sajtu se nigdje ne vidi.
Mora biti položena (vodoravna), najmanje 1200 × 630 piksela.
Najbolje: lijepo auto ili primorje.
Ako je nema — pri dijeljenju se ne pojavi nikakva slika. Izgleda loše.
21Naslovni dio (Homepage Hero)
Meni: Appearance → Homepage Hero
Kartica 1 — Hero text
Ono što gost prvo pročita kad otvori sajt. Tri polja, sva sa globusom:
Eyebrow line — sitan natpis iznad naslova
Headline — veliki naslov
Subheadline — rečenica ispod naslova
Kartica 2 — Service cards (dvije velike kartice)
Dvije velike slike-dugmad: „Rent a Car“ i „Airport Transfer“. To su glavna vrata sajta.
Slika — klikni Choose file i ubaci novu. Najbolje uspravna, lijepa fotografija.
Title — naslov na kartici. Globus.
Short line — jedna rečenica ispod naslova. Globus.
Links to — gdje kartica vodi: Rent a Car flow ili Airport Transfer flow. Ovo ne diraj — jedna kartica mora voditi na najam, druga na transfer.
Kartica 3 — Background photos (pozadinske slike)
Velike fotografije u pozadini naslovnog dijela. Same se smjenjuju, jedna za drugom, uz blago približavanje.
Može najviše 5 slika.
Da dodaš: klikni Choose file i izaberi sliku. Panel je sam smanji i stisne.
↑↓ — mijenjaj redosljed smjenjivanja.
🗑 — obriši sliku.
Kakve slike ovdje najbolje izgledaju
Široke, položene fotografije po danu — primorje, zaliv, auto na putu. Preko njih ide bijeli tekst, pa izbjegavaj slike koje su gore vrlo svijetle, jer se tekst tad slabije čita.
22Ikonice (Icons)
Meni: Appearance → Icons
Spisak svih sličica koje se koriste na sajtu. Za svaku imaš dvije mogućnosti:
Built-in design — padajuća lista gotovih sličica. Izaberi drugu i mijenja se svuda gdje se ta sličica koristi.
Or upload custom — ubaci svoju sličicu (SVG ili PNG). Isto važi za cijeli sajt.
Ako si ubacio svoju pa hoćeš nazad na fabričku — pritisni Remove custom, use built-in.
Kad završiš: Save icon changes.
Ovo ti vjerovatno nikad neće trebati
Ikonice su već podešene i lijepo izgledaju. Diraj ih samo ako imaš svoje sličice napravljene kod dizajnera.
23Sve slike na jednom mjestu (Media Files)
Meni: Appearance → Media Files
Ovdje se ne kuca ništa. Ovo je spisak svih slika na sajtu i tvoj alat za provjeru.
Šta ti kaže vrh strane
Koliko ukupno slika sajt koristi.
Koliko si novih slika ubacio u ovoj sesiji i koliko zauzimaju. Ako ovaj broj nije nula, MORAŠ objaviti preko ZIP-a (poglavlje 25).
Ako neka slika fali — plavi okvir sa brojem.
Dugme Check for missing files
Pritisni ga i panel provjeri svaku sliku na serveru. Rezultat:
„All referenced files found“ — sve je u redu.
Broj slika koje fale — te slike su označene u spisku ispod. To znači da negdje na sajtu gost vidi prazan okvir.
Grupe u spisku
Hero photos · Vehicle photos · Our Story photos · Story chapter photos · Guest Review photos · General photos · Videos
Za svaku sliku vidiš: sličicu, gdje se koristi, putanju fajla, veličinu i status. Kanta briše sliku sa tog mjesta.
Pažljivo sa kantom ovdje
Brisanje odavde odmah skida sliku sa sajta. Nema pitanja „jesi li siguran“. Obriši samo ako si potpuno siguran.
24Redosljed sekcija na naslovnoj
Meni: Appearance → Section Order
Ovdje mijenjaš kojim redom se sekcije pojavljuju na naslovnoj strani i možeš neku potpuno sakriti.
↑↓ — pomjeri sekciju gore ili dolje.
Shown — kvačica. Skini je i sekcija nestane sa naslovne.
Sekcije: Hero · Why Book Direct · Trust Badges · How It Works · Booking Widget · Vehicle Fleet · Transfer Routes · Guest Reviews · About / Our Story · FAQ · Contact
Hero se ne pomjera
Hero (gornji baner) je uvijek prvi i ne može se sakriti. Kod njega su strelice sive — to je tako namjerno.
Kad završiš: Save section order. Sajt se odmah promijeni pred tobom.
25Objavljivanje (Publish) — dva načina
Meni: Publish → Publish / Export · ili dugme Publish / Export gore desno
Ovo je najvažnija strana u panelu. Dok ovo ne uradiš, gosti vide stari sajt.
Zašto uopšte postoje dva načina
Slike nisu upakovane u sam sajt — one stoje kao obični fajlovi pored njega. Zato sajt brzo radi i kad imaš 40 auta. Ali to znači: ako si dirao slike, treba poslati i njih. Ako nisi — dovoljan je samo tekst.
Prvo se zapitaj: da li sam dirao slike?
Šta si radio
Šta ti treba
Ubacio ili obrisao bilo koju sliku, logo, sliku za dijeljenje, sliku auta, galeriju…
Način 1 — ZIP
Samo cijene, tekstovi, brojevi telefona, radno vrijeme, sakrio auto, promijenio boje…
Način 2 — samo index.html
Nisi siguran
Uzmi ZIP. Uvijek radi.
Panel ti sam kaže
Ako si ubacio nove slike, na vrhu strane Publish stoji plavi okvir: „X new image file(s) are waiting to be published“. Kad ga vidiš — uzmi ZIP.
Način 1 — Download full site package (.zip)
Skida cijeli sajt u jednom fajlu: index.html, sve slike, svi video zapisi i tri pomoćna fajla (_redirects, robots.txt, sitemap.xml).
Pritisni Download full site package (.zip)
Dugme se promijeni u „Collecting files…“ — panel skuplja sve slike. Sačekaj. Može trajati i pola minuta.
Kad završi, fajl arvello-site-package.zip padne u Downloads i iskoči zelena poruka.
Idi na poglavlje 26 — Cloudflare.
NAJVAŽNIJE UPOZORENJE U CIJELOM UPUTSTVU
ZIP mora biti napravljen dok je panel otvoren na pravoj adresi sajta na internetu.
Ako otvoriš index.html koji ti stoji na kompjuteru i tu pritisneš ZIP — panel ne može da dohvati slike koje su na serveru i napraviće polovičan sajt. Gosti onda vide prazne okvire umjesto auta.
Ako se to desi, panel će ti otvoriti prozor „Some photos could not be collected“ sa spiskom fajlova koji fale. Ako to vidiš — ne šalji taj ZIP nigdje. Otvori pravu adresu sajta, uđi u panel tamo i ponovi.
Način 2 — Download index.html only
Skida samo jedan fajl — index.html. Brzo, ali zahtijeva da imaš spremljen folder sajta (vidi poglavlje 26).
Pritisni Download index.html only
Fajl index.html padne u Downloads odmah.
Idi na poglavlje 26 — Cloudflare.
Ako ti je muka od razmišljanja
Uvijek uzmi ZIP. Traje trideset sekundi duže i nikad ne griješi. Način 2 postoji samo da bi bilo brže — ne moraš ga nikad koristiti.
Druga kartica na ovoj strani
Ispod stoji podsjetnik „Change the admin key before going live“ sa tvojim trenutnim tajnim ključem. Ako još piše admin-CHANGE-ME — vrati se na poglavlje 2 i promijeni ga.
26Postavljanje na internet (Cloudflare)
Skinuo si fajl. Sad ga treba poslati na internet. To se radi na Cloudflare-u, prevlačenjem mišem.
Priprema — jednom, zauvijek
Napravi sebi „glavni folder“
Na desktopu napravi folder i nazovi ga ARVELLO-SAJT. U njemu će uvijek stajati posljednja verzija sajta: index.html, folder images, i tri pomoćna fajla. Tako uvijek znaš gdje ti je sajt.
Ako imaš ZIP (Način 1)
Otvori dash.cloudflare.com i prijavi se.
U meniju lijevo klikni Workers & Pages.
Klikni na svoj projekat sajta na spisku.
Klikni Create a new deployment (može pisati i „Create deployment“ ili „Upload assets“ — to je isto dugme).
Prevuci ZIP fajl u okvir na ekranu, ili klikni na okvir i izaberi ga. ZIP ne treba raspakivati — Cloudflare ga sam otvori.
Klikni Deploy site / Save and Deploy.
Sačekaj zeleno Success. Traje 20–60 sekundi.
Otvori svoj sajt i provjeri da vidiš promjenu.
Raspakuj ZIP na desktopu i njegov sadržaj stavi u ARVELLO-SAJT, preko starog. Sad ti je glavni folder opet svjež.
Ako imaš samo index.html (Način 2)
Otvori folder ARVELLO-SAJT.
Prevuci novi index.html iz Downloads u taj folder i potvrdi Replace / Zamijeni.
Otvori dash.cloudflare.com → Workers & Pages → svoj projekat → Create a new deployment.
Prevuci cijeli folder ARVELLO-SAJT (ne samo index.html!) u okvir.
Deploy → sačekaj Success → provjeri sajt.
Zašto cijeli folder, a ne samo index.html
Cloudflare svaki put pravi kompletnu novu verziju sajta od onoga što mu daš. Ako mu daš samo index.html — dobio je sajt bez ijedne slike. Sve slike nestaju sa sajta.
Pravilo: Cloudflare-u uvijek daješ ili ZIP ili cijeli folder. Nikad pojedinačan fajl.
Provjera poslije objavljivanja
Otvori sajt u novom prozoru (najbolje anonimni / Incognito — tako sigurno ne gledaš staru verziju iz memorije).
Provjeri baš ono što si mijenjao.
Otvori i na telefonu.
Klikni na jedno auto i provjeri da se slike vide.
Ako vidiš staru verziju
Pretraživač je zapamtio stari sajt. Pritisni Ctrl + Shift + R (na Mac-u Cmd + Shift + R) da se osvježi do kraja. Ili otvori u anonimnom prozoru.
27Brzi recepti — 14 najčešćih poslova
Otvori, uradi, gotovo. Svaki recept se završava sa Publish + Cloudflare (poglavlja 25 i 26).
1. Promijeniti cijenu jednog auta
Fleet & Prices → Vehicles → klik na auto → blok 7 → promijeni Rate / day → Save all changes on this page → Publish (samo index.html)
2. Sakriti auto koje je izdato
Fleet & Prices → Vehicles → nađi auto → skini kvačicu Visible → Save → Publish (samo index.html)
3. Dodati novo auto
Cijeli postupak je u poglavlju 6.4. → Publish (ZIP)
4. Zamijeniti sliku auta
Fleet & Prices → Vehicles → klik na auto → blok 0 → kanta na staroj slici → + Add photo → Choose file → ★ da bude glavna → Save → Publish (ZIP)
5. Promijeniti broj telefona
Business → General → kartica Contact & booking → promijeni sva tri polja: prikaz, tel: link, WhatsApp → Save → Publish (samo index.html)
6. Promijeniti radno vrijeme
Business → General → kartica Working hours → promijeni sva tri polja u redu (uključujući Search engine format) → Save → Publish (samo index.html)
7. Dodati novu rutu transfera
Fleet & Prices → Transfer Routes → + Add route → podesi From, To, trajanje i sve četiri klase → Save → Publish (samo index.html)
8. Podići cijene za ljeto
Fleet & Prices → Seasons → otvori ljetnju sezonu → Price multiplier npr. 1.3 → označi mjesece → Active uključeno → Save → Publish (samo index.html)
9. Dodati novo pitanje u FAQ
Content → FAQ → + Add question → upiši pitanje i odgovor (globus za jezike) → kvačice Visible i po želji Show on homepage → Save → Publish (samo index.html)
10. Dodati utisak gosta
Content → Guest Reviews → + Add review → ime, država, zvjezdice, datum, izvor, tekst → Save → Publish (ZIP ako si dodao sliku, inače samo index.html)
11. Dodati novo mjesto preuzimanja
Business → Locations → + Add location → Internal value bez razmaka i naših slova → Label na 4 jezika → doplate → Save → Publish (samo index.html)
12. Promijeniti cijenu punog osiguranja
Fleet & Prices → Vehicles → klik na auto → blok 6 → Full Insurance / day → Save. Ponovi za svako auto — to je poseban broj po autu. → Publish (samo index.html)
Appearance → Section Order → skini kvačicu Shown kod te sekcije → Save section order → Publish (samo index.html)
28Šta NE smiješ da radiš
Devet stvari koje prave probleme
Ne zatvaraj karticu prije Publish-a. Sve što si radio nestaje. Bez upozorenja.
Ne radi u fajlu sa kompjutera. Uvijek na pravoj adresi sajta. Inače ZIP izađe polovičan.
Ne mijenjaj Internal value kod postojećih mjesta preuzimanja (poglavlje 10).
Ne briši Web3Forms ključ. Prestaju da stižu rezervacije na mejl.
Ne briši {amount} i {year} iz tekstova. To su mjesta gdje sajt sam upisuje broj.
Ne mijenjaj pravne dokumente bez advokata (poglavlje 12).
Ne stavljaj isti mjesec u dvije sezone. Cijene postaju nepredvidive.
Ne šalji Cloudflare-u samo index.html. Uvijek ZIP ili cijeli folder.
Ne dijeli admin adresu. Ko je ima — može promijeniti sve.
A ovo možeš slobodno
Sve ostalo. Klikaj, probaj, gledaj kako izgleda. Dok ne uradiš Publish, ništa od toga ne vide gosti. Ako ti se ne sviđa — zatvori karticu bez snimanja i sve je kao prije.
29Ako nešto ne radi
Problem
Zašto
Rješenje
Panel se ne otvara
Pogrešan ključ ili razmak u adresi
Provjeri da poslije # nema razmaka i da su sva slova tačna. Ključ razlikuje velika i mala slova.
Promjena se ne vidi gostima
Nije urađen Publish
Poglavlja 25 i 26. Ovo je razlog u 9 od 10 slučajeva.
Promjena se ne vidi ni tebi
Pretraživač pamti staro
Ctrl + Shift + R (Mac: Cmd + Shift + R), ili otvori anonimni prozor.
Izgubio si sve što si kucao
Prešao si na drugu stranu bez Save
Nema povratka. Ubuduće: Save prije svakog prelaska.
Slike se ne vide na sajtu
Poslao si samo index.html umjesto foldera / ZIP-a
Napravi novi ZIP na živom sajtu i pošalji ponovo.
Prozor „Some photos could not be collected“
ZIP je pravljen iz fajla na kompjuteru
Otvori pravu adresu sajta, uđi u panel tamo, napravi ZIP ponovo. Stari ZIP baci.
Žuti okvir „Check your pricing tiers“
Rupa ili preklapanje u cijenama po danima
Pročitaj šta piše u okviru — kaže tačan dan koji je problem. Ispravi From i To.
Auto se ne vidi na naslovnoj
Ili je skinuta kvačica Visible, ili je ispod Homepage display limit
Provjeri kvačicu, pa povećaj limit, pa strelicama podigni auto više.
Sekcija „Utisci gostiju“ nestala
Nijedan utisak nema Show on homepage
Uključi kvačicu bar kod jednog utiska.
Narandžasta tačkica na globusu
Neki jezik nije popunjen
To nije greška. Sajt tu koristi engleski. Popuni kad stigneš.
Mapa u kontaktu ne radi
Zalijepljen kratki link maps.app.goo.gl
Google Maps → Share → Embed a map → kopiraj cijeli kod → zalijepi → Save → provjeri kontakt sekciju.
Cijena je viša nego što si upisao
Sezona množi cijenu
Fleet & Prices → Seasons — provjeri množilac za taj mjesec.
Kad obavijestiti developera
Panel pokriva sve svakodnevne poslove. Javi se samo za ovo:
Želiš video na sajtu.
Želiš potpuno novu mogućnost koje nema u panelu (nova sekcija, novo polje, nova strana).
Izgubio si admin ključ.
Nešto se ponaša drukčije nego što piše u ovom uputstvu.
Kad zoveš, reci ove tri stvari
1. Na kojoj strani panela si bio 2. Šta si tačno pritisnuo 3. Šta se desilo umjesto onoga što si očekivao
I pošalji sliku ekrana. Tako se rješava za pet minuta umjesto za sat vremena.
✓Zapamti samo ovo
Kucaj
Nađi stranu u meniju i promijeni što treba.
Save
Dolje: Save all changes on this page.
Publish
Dirao slike → ZIP. Nisi → index.html.
Cloudflare
Prevuci ZIP ili folder → Deploy → provjeri sajt.
Sva četiri koraka, svaki put. Onda ne može ništa da pođe naopako.
Guide for the Site Owner
How to Change Everything on the Site Yourself
This guide is written as simply as possible. If you know how to open Facebook, you know how to do this. No programming. You just type into fields and press buttons.
★Start Here
First: how to log into the admin panel
There is no username or password. You log in with a secret address: your site's address, then a # sign, then the secret key. No spaces.
https://arvellorantacar.com#admin-CHANGE-ME
Type that into Chrome and press Enter. The site disappears and a blue panel appears — you're in. Full details are in .
Second, and most important: the panel and the site are not the same thing
This is the one thing you must understand before touching anything. When you change something in the panel, the site on the internet does not change by itself. You are looking at your own version, on your own screen. Guests are still looking at the old one.
For guests to see the change, you have to send it to the internet. It's always the same path, always all three steps:
Change it — find the page in the menu and type what needs to change.
Save — press Save all changes on this page at the bottom. The change is now saved in the panel. You see it on your screen. Guests still don't see it.
Publish + Cloudflare — download the file from the Publish / Export page, then drag it onto Cloudflare. Only now do guests see the new version. ( and .)
Think of it like this
Save is like writing a letter and putting it in an envelope. The letter exists, but it's still at your house.
Publish + Cloudflare is the trip to the post office. Only once you hand over the envelope does the letter reach the other person.
If you only do Save and close the computer — the letter stays at your house, and it disappears forever. Tomorrow you'll see the old version on the site and wonder where your work went.
How to use this guide
On the left is a list of all the topics — click a topic and you jump straight to it. If you're looking for something quickly, type into the Search field top left (e.g. "price" or "photo") and only the topics you need will remain.
1Golden Rules
Five things. Remember them and you can't break anything.
1. Don't close the tab
The panel doesn't remember anything on its own. If you close the window before doing Publish — everything you typed is gone. Forever.
2. Always work on the live site
Open the real site address in your browser. Never open the index.html file sitting on your computer.
3. Save, then move on
Before you go to another page in the menu — press Save all changes on this page. Otherwise you lose what you typed.
4. Deleting can't be undone
Once you delete a car or a question and save — there's no "undo". Look carefully first, then delete.
5. After everything — Publish
It's not done until you download the file and drag it onto Cloudflare. That's chapters 25 and 26.
The most common mistake in practice
Someone spends an hour changing prices, saves everything nicely, closes the computer — and the next day sees the site is still the same as before. Because they didn't do Publish. It was all lost.
Remember this order: Type → Save → Publish → Cloudflare. Always all four.
2How to Log Into the Admin Panel
There is no username or password. You log in with a secret address. Whoever knows the address — is in.
Open Chrome (or Safari) on the computer.
Type in the site address, then with no spaces add a # sign and the secret key:
https://arvellorantacar.com#admin-CHANGE-ME
Press Enter. The site disappears, a blue panel appears. That's it — you're in.
Save it in your Favorites
Once you're inside, press the star icon in your browser and save the address as "Admin". Tomorrow you just click it and you're straight in. Don't send that address to anyone.
How to leave the panel
Top right is the View site button. Press it and you see your site the way guests see it. The panel has only hidden itself, it hasn't disappeared — you go back by adding #key to the address again.
Changing the secret key
The current key is admin-CHANGE-ME. This is the factory key and it must be changed before the site goes live, because someone could guess it.
Menu: Business → General
Scroll down to the Integrations & security tab.
In the Admin key field, type something of your own that nobody can guess. For example milos-tivat-9417. No spaces, no accented letters (č, ć, š, ž, đ).
Press Save integrations & security. The address in your browser changes by itself immediately.
Immediately do Publish (chapter 25), otherwise the old key stays live on the internet.
Save the new address in your Favorites and delete the old one.
If you forget the key
There is no "forgot password" button. You won't be able to get in. Write the key down on paper and keep it somewhere safe.
3Panel Map — What's Where
Top (the bar that's always there)
Admin — Arvello Rent a Car — just the name, nothing to click.
View site — look at the site the way a guest sees it.
Publish / Export — a shortcut to downloading the file for publishing.
Left (the menu with 5 drawers)
Click a drawer's name and it opens. Inside are the pages.
Drawer
What's Inside
When You Open It
Business
General, Locations, Legal Documents
Company details, phone numbers, working hours, pickup locations, contracts
Fleet & Prices
Vehicles, Extras & Pricing, Transfer Routes, Seasons
This is where you'll spend the most time. Cars, prices, extras, transfers
Content
Site Text, FAQ, Guest Reviews, Comparison Table, Trust Badges, Our Story
Text content, questions and answers, guest reviews, the company story
Appearance
Theme & Colors, Logo & Branding, Homepage Hero, Icons, Media Files, Section Order
Colors, logo, header photos, section order
Publish
Publish / Export
When you've finished everything and want to publish
It looks different on a phone
On a phone there's no menu on the side. Instead you have a dropdown list at the top of the screen — you tap it and choose a page. Everything else works the same.
Tip: change small things from your phone if you must, but do the publishing (Publish) from a computer — it's easier.
Middle (the work area)
Every page is split into white cards. Each card has a title, a short explanation, and its own save button. At the bottom there's always a big Save all changes on this page button.
4How Saving Works — Two Buttons
There are two kinds of save buttons in the panel. Don't worry — they work almost the same.
Button
What It Does
When You Use It
Save… (inside a card)
Saves only that one card. E.g. Save working hours saves only the working hours.
When you've changed one small thing and want to see the result right away
Save all changes on this page (at the bottom, always visible)
Saves all the cards on that page at once.
Always use this one. It's safer — you can't forget anything.
The simplest rule
Forget about the small buttons. When you finish working on a page — press Save all changes on this page at the bottom and move on. Done.
How you know it's saved
When you save, a green message appears at the top for a second (e.g. "Vehicles saved."). If the message didn't pop up — you haven't saved, press again.
Two pages that have no Save button
Media Files and Publish / Export have no save button. That's normal — there's nothing to type on them.
What happens if you switch pages without saving
Everything you typed disappears. No question, no warning. So: Save first, then click another page.
5Writing in 4 Languages
The site speaks four languages: English (EN), Russian (RU), Hebrew (HE) and Serbian (SR). That's why almost every text field has a small globe 🌐 button next to it.
In the field you see one language — usually English. The button says EN.
Click the globe. A list opens: EN, RU, HE, SR.
Pick a language. The field switches and now you type in that language.
Type → globe again → next language. When you're done, save.
What the orange dot means
If you see an orange dot on the globe — it means at least one language hasn't been filled in. In the list, a checkmark ✓ appears next to each language that has been filled in.
You don't have to fill in every language
If you leave Russian empty, the site will show the English text to a Russian guest. The site never breaks because of an empty field. The orange dot is just a reminder, not an error.
Rule: always fill in English. The rest, when you get to it.
Hebrew is written right to left
When you select HE, the text goes to the other side. That's normal, that's how Hebrew is written. Don't touch anything.
6Vehicles — the Most Important Chapter
Menu: Fleet & Prices → Vehicles
This is where you add cars, change prices, attach photos, and hide a car that's currently rented out. You'll spend 90% of your time here.
6.1 Two settings above the list
Field
What It Does
Homepage display limit
How many cars are shown on the homepage. The rest are on the /cars page where all of them are always shown. E.g. you enter 9 → the homepage shows 9 cars plus a "See more cars" button.
Show the "Deposit & insurance" box
A checkbox. If it's on, each car's page shows a box with the deposit and insurance info. If you turn it off, the page is shorter — but the rules still apply, they just aren't repeated there.
6.2 What one row in the list looks like
Every car is one row. From left to right:
↑↓ — move the car up or down in the list. Cars at the top are seen first by guests.
Car name, with the class and price shown small underneath. Click the name to open the row.
Visible — a checkbox. Uncheck it and the car disappears from the site, but stays saved for you. A HIDDEN label appears.
🗑 — deletes the car forever.
Is the car rented out or in for service?
Don't delete it. Just uncheck Visible and save. It disappears from the site. When it's back — check the box again. This way you don't lose the photos, prices, or description.
6.3 Eight blocks inside a car
When you click a car's name, the row opens and inside are eight blocks, each with its own number in a blue circle. Let's go through them in order.
Block 0 — Photos
Up to 5 photos per car.
The first photo has a yellow MAIN tag — that's the photo the guest sees first.
To add a photo: click Choose file under the empty square and pick a photo from your computer.
★ — set that photo as the main one (moves it to first place).
↑↓ — move the photo left/right.
🗑 — delete the photo.
+ Add photo — add another photo slot (up to 5).
You don't need to resize photos
The panel shrinks and compresses every photo automatically. Feel free to upload photos straight from your phone. It looks best when the car is photographed horizontally (landscape), fully in frame, in daylight.
Block 1 — Vehicle Name
Just one field, no translation — the car name is the same in every language. E.g. Toyota Yaris or similar.
Block 2 — Description
Two or three sentences about the car. It has a globe — translate into 4 languages.
Block 3 — Specifications
Rows the guest sees on the car's page. You can add, delete, and reorder them.
Custom specification… — your own row. You type both the name and the value yourself, in 4 languages. E.g. "Roof rack — yes".
Pick a type from the dropdown list and press + Add.
Every row has arrows to reorder it and a bin icon to delete it.
Block 4 — Included with This Vehicle
A checklist the guest sees. E.g. "Basic insurance", "Unlimited mileage".
+ Add bullet adds a new row. The bin deletes a row. Every row has a globe for translation.
Block 5 — Vehicle Rules
The same as block 4, but for rules. E.g. "No smoking", "Minimum age 21".
+ Add rule adds a row.
Block 6 — Deposit & Insurance
These are the four most sensitive fields in the whole panel. A wrong number = the wrong price for a guest.
Field
Meaning
Deposit
Cash the guest leaves at pickup and gets back when they return the car undamaged.
Damage responsibility
The most a guest pays if they damage the car — when they don't have full insurance.
Damage liability WITH full insurance
The most a guest pays if they damage the car — when they do have full insurance. Usually 0.
Full Insurance / day
How much full insurance costs per day for that specific car. The guest picks it as an add-on when booking.
Careful
These four numbers are set separately for every car. A more expensive car = a bigger deposit. If you add a new car, these fields start at 0 — you have to fill them in.
Block 7 — Pricing & Price Tiers
This is where the daily price is set. It works in tiers: the more days, the cheaper it is per day.
Field
Meaning
From (days)
From which day this price applies
To (days)
Up to which day. Leave blank = "and beyond"
Rate / day
Price per day, in euros
Note
Small text the guest sees, e.g. "Price for 4+ days". It has a globe.
A working example:
Tier
From
To
Rate
1.
1
3
40
2.
4
6
34
3.
7
(blank)
28
+ Add tier adds a tier. The bin deletes it (the last one can't be deleted).
The panel warns you automatically if you make a mistake
If you leave a gap (e.g. 1–3 then 5–7, with day 4 having no price) or the tiers overlap, a yellow box appears telling you exactly where the mistake is. Saving won't be blocked — you have to fix it yourself. Read that warning.
6.4 How to add a new car — step by step
Menu: Fleet & Prices → Vehicles
Scroll to the bottom of the list and press + Add vehicle.
A car named New vehicle appears at the end of the list. Click it to open it.
Block 1: type the real name, e.g. Toyota Yaris or similar.
Block 0: add photos. Put the best one first (★).
Block 2: write the description in English, then use the globe for the other languages.
Block 3: set the class, gearbox, fuel type, seats, doors, and luggage.
Block 6: fill in all four numbers — deposit, damage responsibility, damage liability with full insurance, and the full insurance price per day. Don't skip this.
Block 7: set the prices per day. The defaults are 40 / 34 / 28 € — change them to yours.
Blocks 4 and 5: check what's included and the rules. Usually nothing needs to change.
Press Save all changes on this page at the bottom.
Use the ↑ arrows to move the car to the position you want in the list, and save again.
Go to Publish (chapter 25) — since you added photos, you need the ZIP.
7Extras & Pricing
Menu: Fleet & Prices → Extras & Pricing
Anything a guest can add to their booking: a child seat, a border crossing, full insurance, an additional driver…
7.1 Six types of extras
The most important field for every extra is Behaviour type — it determines how the extra behaves and is charged.
Type
How It Works
Example
Included
Always included, just information. The guest doesn't choose it and doesn't pay for it.
Basic insurance
Free
The guest turns it on with a switch, but pays nothing.
Free child seat
Per day
A switch. Price × number of days.
GPS 3 €/day
One-time
A switch. Charged once, regardless of days.
Border crossing
Per unit
The guest picks a quantity (+ and −). Price × unit.
2 child seats
Full Insurance
A special case. You don't enter the price here — it's taken from each car (block 6).
Full insurance
The price fields change automatically
When you change the Behaviour type, the fields below adjust: with "Per day" you get Price / day, with "One-time" you get Flat price, with "Per unit" you get Price / unit and Max quantity, and with "Full Insurance" there's no price field because it comes from the car.
7.2 Special case: border crossing
A One-time extra can also have a list of countries.
Turn on the Show a destination-country dropdown to the guest checkbox.
A Country list field opens below — type one country per line: CroatiaBosnia and HerzegovinaAlbaniaSerbia
The same price applies to every country on the list. If Croatia should cost differently from Albania, you have to create two separate extras.
7.3 Other fields
Icon — a small icon next to the extra. You pick it from a list, and you see immediately below how it looks.
Label — the name the guest sees. Globe, 4 languages.
Note — a small explanation under the name. Not required.
Visible / offered — a checkbox. Uncheck it and the extra disappears from the site.
+ Add extra creates a new extra (starts as "Per day", price 0). Arrows change the order, the bin deletes it.
8Transfers — Routes and Prices
Menu: Fleet & Prices → Transfer Routes
8.1 Two settings above the list
Homepage display limit — how many routes show on the homepage. All of them are always on the /transfers page.
Round-trip discount (%) — a discount when a guest books a transfer in both directions. You enter e.g. 10 and the system automatically takes 10% off the total.
8.2 One route
Field
Meaning
From
From where. You pick from the list of locations.
To
To where. You pick from the list of locations.
Price (Sedan)
The base price — for a sedan, one way.
Duration (minutes)
How long the ride takes, in minutes. The guest sees this in the table.
Price per vehicle class — the price for each vehicle class, one way:
Sedan
up to 3 passengers
Minivan
up to 6 passengers
Van
up to 8 passengers
VIP
a luxury vehicle
Visible on site
A checkbox. Uncheck it and the route disappears from the site.
Fill in all four classes
If you leave a class empty, the price is taken from the Price (Sedan) field. That means a van could end up costing the same as a sedan. Always enter all four numbers.
+ Add route creates a new route (default: Tivat Airport → Kotor, 20 €, 20 min). Change it to yours right away.
9Seasons — Summer and Winter Prices
Menu: Fleet & Prices → Seasons
A season doesn't change prices manually. It multiplies every car's price by a certain number, in the months you choose.
Multiplier
What Happens
1.0
Full price, nothing changes
1.3
30% more expensive (summer)
0.8
20% cheaper (winter)
0.7
30% cheaper
Fields
Season name — the name, e.g. "High season". Globe, 4 languages.
Price multiplier — the number from the table above.
Months in this season — checkboxes for the 12 months. Mark the months that belong to this season.
Active — a checkbox. Turn it off and the season no longer affects prices.
One month = one season
Never put the same month in two seasons. If a month isn't in any season — it's charged at full price (1.0). That's fine.
How it works in practice
If a car costs 40 €/day, and July is in a season with a 1.3 multiplier — in July the guest sees 52 €/day. You don't have to change the car's price.
10Pickup and Return Locations
Menu: Business → Locations
These are the places a guest picks from a dropdown list when booking a car.
Field
Meaning
Internal value
A technical code. No spaces, no accented letters. E.g. tivatCenter. The guest never sees it. Don't touch this for existing locations.
Label
The name the guest sees, e.g. "Tivat — Center". Globe, 4 languages.
Pickup fee
A surcharge when a guest picks up here. Enter 0 if there's no surcharge.
Return fee
A surcharge when a guest returns here. Charged once.
Why you must not touch "Internal value"
That code links the location to transfer routes and to bookings. If you change it for an existing location, the links break and something on the site stops working. Only change the Label.
+ Add location creates a new location. Arrows change the order in the list, the bin deletes it.
11Company Details (General)
Menu: Business → General
This is a long page with seven tabs. Let's go through them in order.
Tab 1 — Business Identity
Field
What You Enter
Business name
The name the guest sees everywhere, e.g. "Arvello Rent a Car"
Legal name
The full legal name from your registration papers, used in the footer and on invoices
PIB / Tax number
The company's tax ID number
PDV / VAT number
The VAT number
Founded year
The founding year. Appears in the footer and in "Est. …"
Currency symbol
The currency symbol. For us, €
Address
The full address
City
The city
Map latitude / longitude
The map coordinates. Find them by right-clicking your location in Google Maps — two numbers will appear.
Tab 2 — Contact & Booking
Field
What You Enter
Phone (display)
The number as it's displayed, with spaces: +382 69 828 454
Phone (tel: link)
The same number with no spaces, for the "Call" button: +38269828454
WhatsApp number
Digits only, no plus sign, no spaces: 38269828454
Email address
The email address bookings are sent to
Google Maps embed URL
The map in the contact section. Go to Google Maps → Share → Embed a map → copy the whole code and paste it in. A plain address also works. Short links like maps.app.goo.gl don't work — the panel tries to fix them automatically. After saving, always check the contact section.
Website domain
The site's real address with https://. Google uses this. Leave it blank until the domain is bought and set up.
Instagram / Facebook / TripAdvisor URL
Full links to the profiles
Tab 3 — Phone Numbers by Language
Not required. Use this if one language has its own number — e.g. a colleague who speaks Hebrew has an Israeli number.
For every language you have three fields: the displayed number, the call number, and the WhatsApp number.
Leave it blank = the main number from tab 2 is used. Only fill in what is actually different.
When a guest switches the site's language, the number in the header and the green WhatsApp button change automatically to that language's number.
Exception: in the Contact section, all numbers are always shown, each labeled with the language it covers.
Tab 4 — Working Hours
Every row has three fields:
Day/label — how it's written for the guest, e.g. "Monday – Sunday". Has a globe.
Hours — the time as the guest sees it, e.g. 06:00 – 22:00
Search engine format — the same thing, but in a format Google understands. The guest does not see this. It's written in abbreviated English, 24-hour format: Mo-Su 06:00-22:00 · Mo-Fr 08:00-20:00 Abbreviations: Mo Tu We Th Fr Sa Su. A range is written with a hyphen.
+ Add row adds a row, Remove row deletes it.
Tab 5 — Languages
For each of the four languages:
A checkbox — whether the language is offered to guests at all. Uncheck it and the language disappears from the list.
Language name in English — just for you, in the panel.
Name shown to guests — how it's written for guests, in that language: English, Русский, עברית, Srpski.
Short code — the two letters on the small button on a phone: EN, RU, HE, SR.
English is the language where everything is filled in. If anything is missing in the other three, they automatically fall back to the English text.
Tab 6 — Integrations & Security
Web3Forms access key — the key that makes bookings arrive in your email. Don't touch it. If you delete it, emails stop being sent.
Admin key — the secret key for logging into the panel. See chapter 2.
Below it, your current admin address is displayed — you can copy it from there.
Tab 7 — Analytics & Privacy
GA4 Measurement ID — Google Analytics, in the form G-XXXXXXXXXX, plus an Enable checkbox.
Cloudflare Web Analytics token — simpler analytics, no cookies, plus an Enable checkbox.
The law is respected automatically
Analytics doesn't start until a guest clicks "Accept" on the cookie banner. If you leave the field blank, that tool is completely disabled. The cookie banner text is changed in Content → Site Text, under the keys that start with cookie.
12Legal Documents
Menu: Business → Legal Documents
Seven documents, each in four languages:
General provisions — the introductory part of the Terms of Use
Rental Terms — rental conditions
Transfer Terms — transfer conditions
Insurance Policy — insurance
Cancellation Policy — cancellations
Privacy Policy — privacy
Cookie Policy — cookies
Four documents merge automatically
Rental Terms + Transfer Terms + Insurance Policy + Cancellation Policy automatically merge, in that order, into one "Terms and Conditions" document that the guest accepts when booking. You write each one only once, here.
How text is formatted
You Type This
You Get
## Heading
A large heading
### Subheading
A smaller heading
**text**
Bold
__text__
Underlined
- item
A bulleted item
The ## and - characters must be at the very start of the line, then a space, then the text.
Automatic fields
If you leave {amount} or [CURRENCY] in the text, the site automatically replaces them with the real number and currency.
This is the only place where you need a lawyer
These are legally binding documents. Don't change them yourself. If something needs to change — ask a lawyer first, then type it here. Everything else in the panel you can change freely.
13Site Text
Menu: Content → Site Text
This is where every piece of text on the whole site lives — every button, every message, every heading. There are hundreds of them.
How to find what you're looking for
At the top is a Search field. Type a word you see on the site — in any language.
Only the rows containing that word remain.
Click the field, change the text. Use the globe to translate into the other languages.
Press Save site text.
Groups the text is sorted into
Group
What It Covers
Homepage sections
The homepage — the headings of every section
Vehicles & booking page
The vehicles page and the booking panel
Airport transfer
Transfers
Forms, wizard & confirmation
Forms, the booking steps, and the confirmation
Standalone pages
Standalone pages: reviews, the story, FAQ, cars, transfers
Header, footer & cookies
The header, footer, and the cookie banner
WhatsApp & e-mail messages
The text of messages sent to WhatsApp and email
System & accessibility
Small system messages
The rule for this page
Only change the words. If you see something in curly brackets in the text, like {amount} or {year} — leave it untouched. These are spots where the site inserts a number automatically. If you delete them, the guest sees a blank space.
Language names aren't changed here
"English / Русский / עברית / Srpski" and the two-letter codes are changed in Business → General → Languages, not here.
14FAQ
Menu: Content → FAQ
Three tabs
Homepage display — how many questions show on the homepage. All of them are always shown on the /faq page.
Section text — the label, heading and subheading above the questions.
FAQ — the questions themselves.
One question
Field
Meaning
Category
Just for you — it helps you stay organized. The guest never sees it.
Question
The question. Globe, 4 languages.
Answer
The answer. Globe, 4 languages.
Visible on site
Whether the question is shown at all
Show on homepage
Whether it also goes on the homepage (within the limit set above)
How to get more visitors from Google
Write the question exactly the way a guest would type it into Google. Not "Deposit", but "Do I need a credit card to book?". Google shows questions like that directly in the search results.
+ Add question adds a question.
15Guest Reviews
Menu: Content → Guest Reviews
Field
What You Enter
Name
The guest's name
Country
The guest's country
Rating (1-5)
The number of stars, from 1 to 5
Date
The date. A calendar opens.
Source
Where the review is from: Google, TripAdvisor, Direct / WhatsApp, or none
Quote
The review text itself. Globe, 4 languages.
Guest photo
Optional. A nice photo is the key handover.
Visible on site
Whether the review is shown
Show on homepage
Whether it also goes on the homepage
If no review is marked for the homepage
The whole "Guest Reviews" section hides itself from the homepage. Nothing is lost — every review stays on the /reviews page, where guests can filter by star rating.
Fair is fair
Only write real reviews from real guests. Fabricated reviews are against the law and can bring a fine, and guests usually spot them quickly anyway.
16Comparison Table
Menu: Content → Comparison Table
The table in the "Why Book Direct" section — two columns: Us and Others (the big chains).
Icon — the small icon at the start of the row.
Us — what you offer. Globe, 4 languages.
Others — how the big chains do it. Globe, 4 languages.
How to write a good row
Work the topic into the sentence itself. Don't just write "Deposit", write "Cash deposit — refunded immediately". That way the guest understands without having to think about it.
17Trust Badges
Menu: Content → Trust Badges
A row of small labels with icons on the homepage: "No advance payment", "Unlimited mileage", and similar.
Icon — the icon.
Text — a short label. Globe, 4 languages.
Visible on site — a checkbox.
Two shortcuts you can use
{amount} — the site automatically fills in the damage-liability amount. {year} — the site automatically fills in the founding year.
Example: you type On the market since {year}, the guest sees "On the market since 2012".
To hide the entire row of badges at once, go to Appearance → Section Order and uncheck "Trust Badges".
18Our Story
Menu: Content → Our Story
Tab 1 — Heading
Three fields: the label above the heading, the main heading, and the slogan.
Tab 2 — Story Text
The main text about the company. A large field, globe, 4 languages.
Tab 3 — Three Numbers
Three tiles below the text. For each, you change both the number and the description, in all 4 languages.
E.g. the number 14+, description "Years on the coast".
Tab 4 — Gallery
Up to 12 photos. On the homepage they cycle automatically as a slideshow, and on the /our-story page they're all shown in a grid.
Every photo can have a caption (a staff member's name, role, date) in 4 languages.
Arrows change the order, the bin deletes.
After changing captions, press Save captions.
Tab 5 — Story Chapters
Longer texts that go on the /our-story page. Good for Google, since it gives the site more text.
Homepage display limit — how many chapters can appear on the homepage.
Every chapter: Heading, Text, Photo (optional).
Visible on site — whether it's shown at all.
Show on homepage — whether it also goes on the homepage.
+ Add chapter adds a chapter.
19Site Colors (Theme & Colors)
Menu: Appearance → Theme & Colors
The easiest way — ready-made palettes
At the top is a grid of 12 ready-made color combinations. Click any one and the whole site changes color instantly, right before your eyes. If you don't like it — click another. Once you find the right one, save.
Manual adjustment
Below the palettes are seven colors. Each has a small square (click it to open a color picker) and a field with the color code.
Color
Where It's Used
Deep navy
The main dark background — header, footer
Navy — mid
The mid shade
Navy — light accent
The lighter shade
Accent gold
The color of the main buttons
Accent gold — light
The button color when you hover over it with the mouse
Accent ink
The color of the text on the gold button
Paper
The light background of the sections
Advice from experience
Pick a ready-made palette and don't touch the individual colors. The palettes are built so the text is always readable. If you change colors yourself, it's easy to end up with white on yellow — which nobody can read.
20Logo & Font (Logo & Branding)
Menu: Appearance → Logo & Branding
Logo
Click Choose file and pick your logo. The panel automatically shrinks and compresses it, but it stays sharp.
A PNG with a transparent background is best — the transparency is preserved. JPG, WebP, and SVG also work.
Logo display height — the logo's height in the header, in pixels. Can be from 24 to 120. The default is 48.
Press Save logo settings.
Company name font
A dropdown list with 8 fonts. Below the list you see a live preview — your company's name written in that font.
Classic Serif — warm, serious (current)
Elegant Didone — luxurious
Traditional Serif — bookish
Slab Serif — sturdy
Neutral Sans — clean, corporate
Geometric Sans — modern
Humanist Sans — friendly
System UI — like the rest of the site
This font is used only for the company name in the header and footer. Nothing else changes.
Share image
The image that appears when someone shares a link to your site on WhatsApp, Facebook, or Instagram. It's not visible anywhere on the site itself.
It must be landscape (horizontal), at least 1200 × 630 pixels.
Best choice: a nice car or the coast.
If there isn't one — no image appears when sharing. It looks bad.
21Homepage Hero
Menu: Appearance → Homepage Hero
Tab 1 — Hero Text
What a guest reads first when they open the site. Three fields, all with a globe:
Eyebrow line — the small label above the heading
Headline — the big heading
Subheadline — the sentence under the heading
Tab 2 — Service Cards (Two Large Cards)
Two large photo-buttons: "Rent a Car" and "Airport Transfer". These are the site's main entry points.
Photo — click Choose file and upload a new one. A nice, vertical photo works best.
Title — the heading on the card. Globe.
Short line — one sentence under the heading. Globe.
Links to — where the card leads: Rent a Car flow or Airport Transfer flow. Don't touch this — one card must lead to rentals, the other to transfers.
Tab 3 — Background Photos
Large photos in the background of the hero section. They cycle on their own, one after another, with a slight zoom effect.
Up to 5 photos.
To add one: click Choose file and pick a photo. The panel shrinks and compresses it automatically.
↑↓ — change the cycling order.
🗑 — delete the photo.
What kind of photos look best here
Wide, landscape daytime photos — the coast, the bay, a car on the road. White text goes over them, so avoid photos that are very bright at the top, since the text becomes harder to read then.
22Icons
Menu: Appearance → Icons
A list of every icon used on the site. For each one you have two options:
Built-in design — a dropdown list of ready-made icons. Pick a different one and it changes everywhere that icon is used.
Or upload custom — upload your own icon (SVG or PNG). Same rule applies — it changes for the whole site.
If you uploaded your own and want to go back to the default — press Remove custom, use built-in.
When you're done: Save icon changes.
You'll probably never need this
The icons are already set up and look good. Only touch them if you have your own icons made by a designer.
23All Images in One Place (Media Files)
Menu: Appearance → Media Files
There's nothing to type here. This is a list of every image on the site, and your tool for checking them.
What the top of the page tells you
How many images the site uses in total.
How many new images you've uploaded in this session and how much space they take up. If this number isn't zero, you MUST publish using the ZIP (chapter 25).
If any image is missing — a blue box with a number.
The Check for missing files button
Press it and the panel checks every image on the server. The result:
"All referenced files found" — everything is fine.
The number of missing images — those images are marked in the list below. That means somewhere on the site a guest sees an empty box.
Groups in the list
Hero photos · Vehicle photos · Our Story photos · Story chapter photos · Guest Review photos · General photos · Videos
For every image you see: a thumbnail, where it's used, the file path, size, and status. The bin deletes the image from that spot.
Be careful with the bin here
Deleting from here immediately removes the image from the site. There's no "are you sure" prompt. Only delete if you're completely sure.
24Section Order on the Homepage
Menu: Appearance → Section Order
This is where you change the order in which sections appear on the homepage, and you can hide one completely.
↑↓ — move a section up or down.
Shown — a checkbox. Uncheck it and the section disappears from the homepage.
Sekcije: Hero · Why Book Direct · Trust Badges · How It Works · Booking Widget · Vehicle Fleet · Transfer Routes · Guest Reviews · About / Our Story · FAQ · Contact
Hero doesn't move
Hero (the top banner) is always first and can't be hidden. Its arrows are grayed out — that's intentional.
When you're done: Save section order. The site changes immediately, right in front of you.
25Publishing — Two Ways
Menu: Publish → Publish / Export · or the Publish / Export button top right
This is the most important page in the panel. Until you do this, guests see the old site.
Why there are two ways at all
Images are not packed into the site itself — they sit next to it as ordinary files. That's why the site stays fast even with 40 cars. But it means: if you touched any images, you need to send them too. If you didn't — the text alone is enough.
First ask yourself: did I touch any images?
What You Did
What You Need
Uploaded or deleted any image, logo, share image, car photo, gallery…
Way 1 — ZIP
Just prices, text, phone numbers, working hours, hid a car, changed colors…
Way 2 — index.html only
You're not sure
Take the ZIP. It always works.
The panel tells you itself
If you've uploaded new images, a blue box appears at the top of the Publish page: "X new image file(s) are waiting to be published". When you see it — take the ZIP.
Way 1 — Download full site package (.zip)
Downloads the whole site in one file: index.html, every image, every video, and three helper files (_redirects, robots.txt, sitemap.xml).
Press Download full site package (.zip)
The button changes to "Collecting files…" — the panel gathers all the images. Wait. It can take up to half a minute.
When it finishes, the file arvello-site-package.zip lands in Downloads and a green message pops up.
Go to chapter 26 — Cloudflare.
THE MOST IMPORTANT WARNING IN THIS ENTIRE GUIDE
The ZIP must be made while the panel is open at the real site address on the internet.
If you open the index.html file sitting on your computer and press ZIP there — the panel cannot reach the images on the server and will produce a half-finished site. Guests will then see empty boxes instead of cars.
If that happens, the panel will open a window saying "Some photos could not be collected" with a list of missing files. If you see that — don't send that ZIP anywhere. Open the real site address, log into the panel there, and try again.
Way 2 — Download index.html only
Downloads just one file — index.html. Fast, but it requires you to already have the site folder ready (see chapter 26).
Press Download index.html only
The index.html file lands in Downloads right away.
Go to chapter 26 — Cloudflare.
If you'd rather not think about it
Always take the ZIP. It takes thirty seconds longer and never goes wrong. Way 2 exists only to be faster — you never have to use it.
The second card on this page
Below is a reminder, "Change the admin key before going live", with your current secret key. If it still says admin-CHANGE-ME — go back to chapter 2 and change it.
26Putting It Online (Cloudflare)
You've downloaded the file. Now it needs to be sent to the internet. That's done on Cloudflare, by dragging it with your mouse.
Preparation — once, forever
Make yourself a "main folder"
On your desktop, make a folder and name it ARVELLO-SITE. It will always hold the latest version of the site: index.html, the images folder, and the three helper files. That way you always know where your site is.
If you have the ZIP (Way 1)
Open dash.cloudflare.com and log in.
In the menu on the left, click Workers & Pages.
Click your site's project in the list.
Click Create a new deployment (it might say "Create deployment" or "Upload assets" — it's the same button).
Drag the ZIP file into the box on screen, or click the box and select it. You don't need to unzip it — Cloudflare opens it automatically.
Click Deploy site / Save and Deploy.
Wait for the green Success. It takes 20–60 seconds.
Open your site and check that you see the change.
Unzip the ZIP on your desktop and put its contents into ARVELLO-SITE, over the old ones. Now your main folder is fresh again.
If you have just index.html (Way 2)
Open the ARVELLO-SITE folder.
Drag the new index.html from Downloads into that folder and confirm Replace.
Open dash.cloudflare.com → Workers & Pages → your project → Create a new deployment.
Drag the entire ARVELLO-SITE folder (not just index.html!) into the box.
Deploy → wait for Success → check the site.
Why the whole folder, not just index.html
Every time, Cloudflare builds a completely new version of the site from what you give it. If you give it only index.html — it gets a site with not a single image. Every image disappears from the site.
Rule: you always give Cloudflare either the ZIP or the whole folder. Never a single file.
Checking after publishing
Open the site in a new window (best in Incognito/private mode — that way you're sure you're not looking at an old version from memory).
Check exactly what you changed.
Open it on your phone too.
Click a car and check that the photos show up.
If you see the old version
Your browser has cached the old site. Press Ctrl + Shift + R (on Mac, Cmd + Shift + R) for a full refresh. Or open it in a private window.
27Quick Recipes — the 14 Most Common Tasks
Open it, do it, done. Every recipe ends with Publish + Cloudflare (chapters 25 and 26).
1. Change the price of one car
Fleet & Prices → Vehicles → click the car → block 7 → change Rate / day → Save all changes on this page → Publish (index.html only)
2. Hide a car that's rented out
Fleet & Prices → Vehicles → find the car → uncheck Visible → Save → Publish (index.html only)
3. Add a new car
The whole process is in chapter 6.4. → Publish (ZIP)
4. Replace a car's photo
Fleet & Prices → Vehicles → click the car → block 0 → bin on the old photo → + Add photo → Choose file → ★ to make it main → Save → Publish (ZIP)
5. Change the phone number
Business → General → the Contact & booking tab → change all three fields: display, tel: link, WhatsApp → Save → Publish (index.html only)
6. Change the working hours
Business → General → the Working hours tab → change all three fields in the row (including Search engine format) → Save → Publish (index.html only)
7. Add a new transfer route
Fleet & Prices → Transfer Routes → + Add route → set From, To, duration, and all four classes → Save → Publish (index.html only)
8. Raise prices for summer
Fleet & Prices → Seasons → open the summer season → Price multiplier e.g. 1.3 → mark the months → Active turned on → Save → Publish (index.html only)
9. Add a new FAQ question
Content → FAQ → + Add question → type the question and answer (globe for languages) → check Visible and, if you want, Show on homepage → Save → Publish (index.html only)
10. Add a guest review
Content → Guest Reviews → + Add review → name, country, stars, date, source, text → Save → Publish (ZIP if you added a photo, otherwise index.html only)
11. Add a new pickup location
Business → Locations → + Add location → Internal value with no spaces or accented letters → Label in 4 languages → the surcharges → Save → Publish (index.html only)
12. Change the full insurance price
Fleet & Prices → Vehicles → click the car → block 6 → Full Insurance / day → Save. Repeat for every car — it's a separate number for each one. → Publish (index.html only)
13. Change the site's colors
Appearance → Theme & Colors → click a ready-made palette → Save theme → Publish (index.html only)
14. Hide an entire section from the homepage
Appearance → Section Order → uncheck Shown for that section → Save section order → Publish (index.html only)
28What NOT to Do
Nine things that cause problems
Don't close the tab before Publish. Everything you did disappears. No warning.
Don't work in the file on your computer. Always on the real site address. Otherwise the ZIP comes out half-finished.
Don't change the Internal value for existing pickup locations (chapter 10).
Don't delete the Web3Forms key. Bookings stop arriving in your email.
Don't delete {amount} and {year} from the text. These are spots where the site inserts a number automatically.
Don't change the legal documents without a lawyer (chapter 12).
Don't put the same month in two seasons. Prices become unpredictable.
Don't send Cloudflare just index.html. Always the ZIP or the whole folder.
Don't share the admin address. Whoever has it can change everything.
And here's what you can do freely
Everything else. Click around, try things, see how they look. Until you do Publish, guests see none of it. If you don't like it — close the tab without saving and everything is back to how it was.
29If Something Doesn't Work
Problem
Why
Solution
The panel won't open
Wrong key or a space in the address
Check that there's no space after the # and that every letter is correct. The key is case-sensitive.
The change isn't visible to guests
Publish wasn't done
Chapters 25 and 26. This is the reason 9 times out of 10.
The change isn't visible to you either
The browser has cached the old version
Ctrl + Shift + R (Mac: Cmd + Shift + R), or open a private window.
You lost everything you typed
You switched pages without saving
There's no undo. From now on: Save before every page switch.
Images don't show up on the site
You sent only index.html instead of the folder / ZIP
Make a new ZIP on the live site and send it again.
The "Some photos could not be collected" window
The ZIP was made from the file on your computer
Open the real site address, log into the panel there, and make the ZIP again. Throw away the old ZIP.
A yellow box saying "Check your pricing tiers"
A gap or overlap in the day-based prices
Read what the box says — it tells you exactly which day is the problem. Fix From and To.
A car isn't showing on the homepage
Either Visible is unchecked, or it's below the Homepage display limit
Check the checkbox, then raise the limit, then use the arrows to move the car up.
The "Guest Reviews" section has disappeared
No review has Show on homepage checked
Check that box for at least one review.
An orange dot on the globe
A language hasn't been filled in
That's not an error. The site uses English there. Fill it in when you get to it.
The map in the contact section doesn't work
A short link like maps.app.goo.gl was pasted in
Google Maps → Share → Embed a map → copy the whole code → paste it in → Save → check the contact section.
The price is higher than what you entered
A season is multiplying the price
Fleet & Prices → Seasons — check the multiplier for that month.
When to Notify Your Developer
The panel covers all the everyday tasks. Only reach out for these:
You want a video on the site.
You want a completely new feature that isn't in the panel (a new section, a new field, a new page).
You've lost the admin key.
Something behaves differently from what this guide says.
When you call, say these three things
1. Which page of the panel you were on 2. Exactly what you pressed 3. What happened instead of what you expected
And send a screenshot. That way it gets fixed in five minutes instead of an hour.
✓Just Remember This
Type
Find the page in the menu and change what needs to change.
Save
At the bottom: Save all changes on this page.
Publish
Touched images → ZIP. Didn't → index.html.
Cloudflare
Drag the ZIP or folder → Deploy → check the site.
All four steps, every time. Then nothing can go wrong.

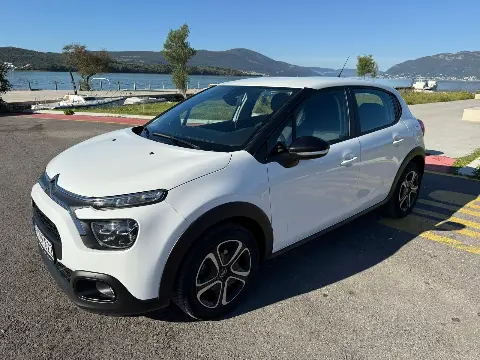 Compact
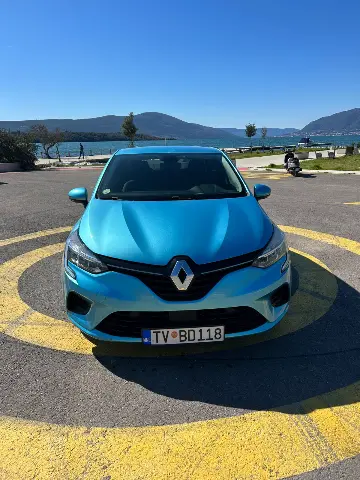 Compact
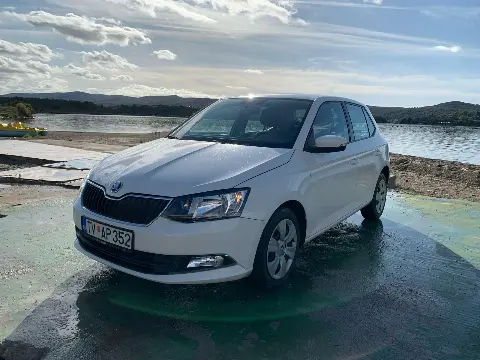 Compact
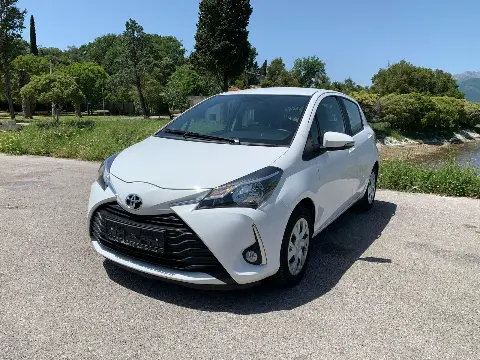 Compact
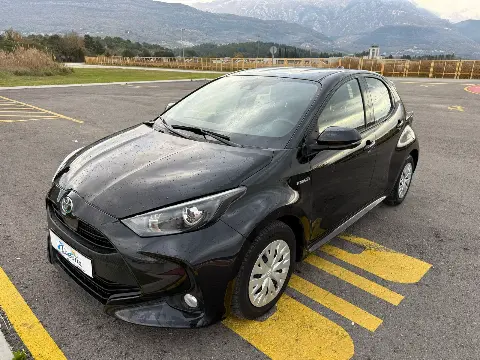 Compact
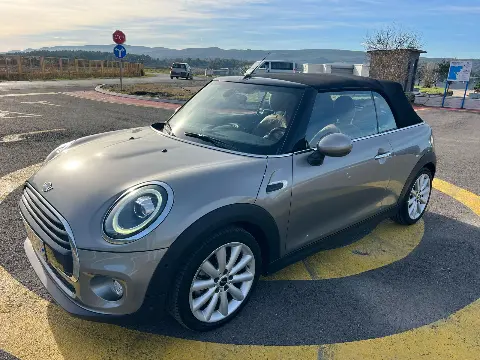 Convertible
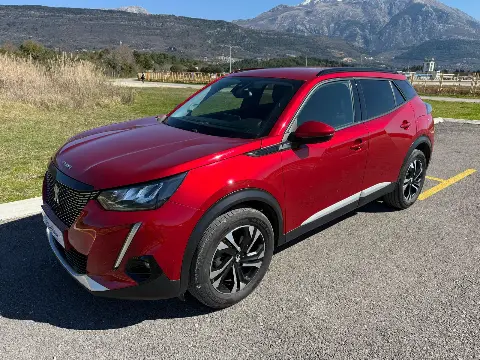 SUV
SUV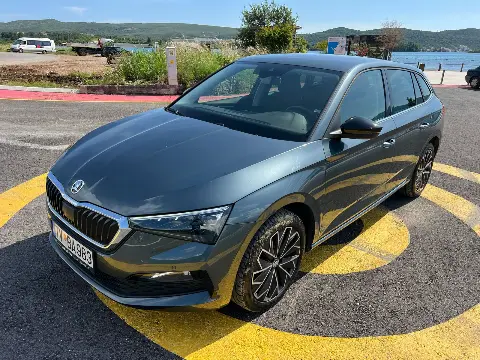 Compact
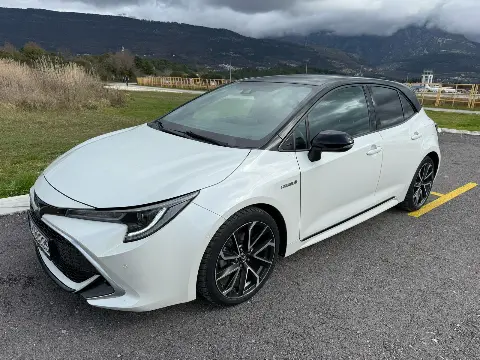 Compact
 One WhatsApp number, answered by the owner